
Inception
Blogging the Blog Creation
Inception
The goal of this blog post is to blog the creation of the blog and this blog post. Its strangeloops all the way down. To get there, we will be using Hugo, the amazing Go based static website generator.
Hugo uses Go templates to generate a static website from Markdown.
Hugo is themeable, and comes with no default theme. In this blog post we will be using the Future Imperfect theme.
Getting the various parts of that theme working took a while to figure out. This blog post will walk you through, step by step, with images, through standing up this blog. What you are reading here is exactly what the instructions walk you through standing up.
It is presumed that we will eventually publish this to GitHub Pages (see subsequent blog post) and so we will be using hugo.${GIT_USERNAME}.github.io in a lot of places.
Without further ado… lets get going.
Install Hugo
Prereqs
We presume in this tutorial that you have git and Go installed. Most of you will already have them (recent versions are always a plus). For those of you who don’t:
Its always an interesting challenge writing instructions that everyone can follow easily without extensive editing. One trick to make it easier is to use ENV variables. You will have a much happier experience cut-and-pasting from here if you pause to set:
export GIT_USERNAME=${your github username}
Build Hugo
Hugo has a variety of install methods. We are going to Go old school here and build it from source. Building [Go] source is pretty easy:
go get github.com/magefile/mage
go get -d github.com/gohugoio/hugo
cd ${GOPATH:-$HOME/go}/src/github.com/gohugoio/hugo
mage vendor
mage install
export PATH=${PATH}:${GOPATH:-$HOME/go}/bin
Test Hugo
If you succeed, you should find testing go easy with:
hugo version
Create a new Hugo site:
Creating a new Hugo site is easy:
hugo new site hugo.${GIT_USERNAME}.github.io
which will create a new directory hugo.${GIT_USERNAME}.github.io containining an initial, effectively empty, Hugo site without a theme.
Initialize as a git repo
All the things are belonging to git:
cd hugo.${GIT_USERNAME}.github.io
git init
Add a .gitignore
Life is always happier with a good .gitignore file:
cat << EOF > .gitignore
## OS Files
# Windows
Thumbs.db
ehthumbs.db
Desktop.ini
$RECYCLE.BIN/

# OSX
.DS_Store
EOF
Commit the initial Hugo source
git add .
git commit -s -m "Initial commit of site"
Note: git only commits directories that have files in them. Since at this stage most of the directories are empty, they will not be part of the commit.
Configuring Hugo
Basic Hugo Config
Hugo’s configuration file is called config.toml.
By default it contains:
$ cat config.toml
baseURL = "http://example.org/"
languageCode = "en-us"
title = "My New Hugo Site"
Lets replace it with some actual data using:
cat << EOF > config.toml
baseURL = "https://${GIT_USERNAME}.github.io"
languageCode = "en-us"
title = "Eudaimonic Tech" # Replace with your on title
EOF
Adding the Future Imperfect Theme
Future Imperfect is a light and flexible Hugo theme. We’ll be using it here.
Fork the Future Imperfect Theme so you have your own copy, in case you want to customize it later.
Add a submodule for the Future Imperfect Theme
git submodule add https://github.com/edwarnicke/hugo-future-imperfect.git
to pull it into the Hugo site being developed.
Configuring Hugo for the Future Imperfect Theme
Hugo needs to be told which theme to use. A simple modification to the config.toml will do the trick:
echo 'theme = "hugo-future-imperfect"' >> config.toml
Serving your site
One of the many cool things Hugo can do is serve your site locally, including automatically updating (typically in 10s of ms) whenever you change your sites content.
hugo serve -D
Point your browser at http://localhost:1313/
It will look something like:
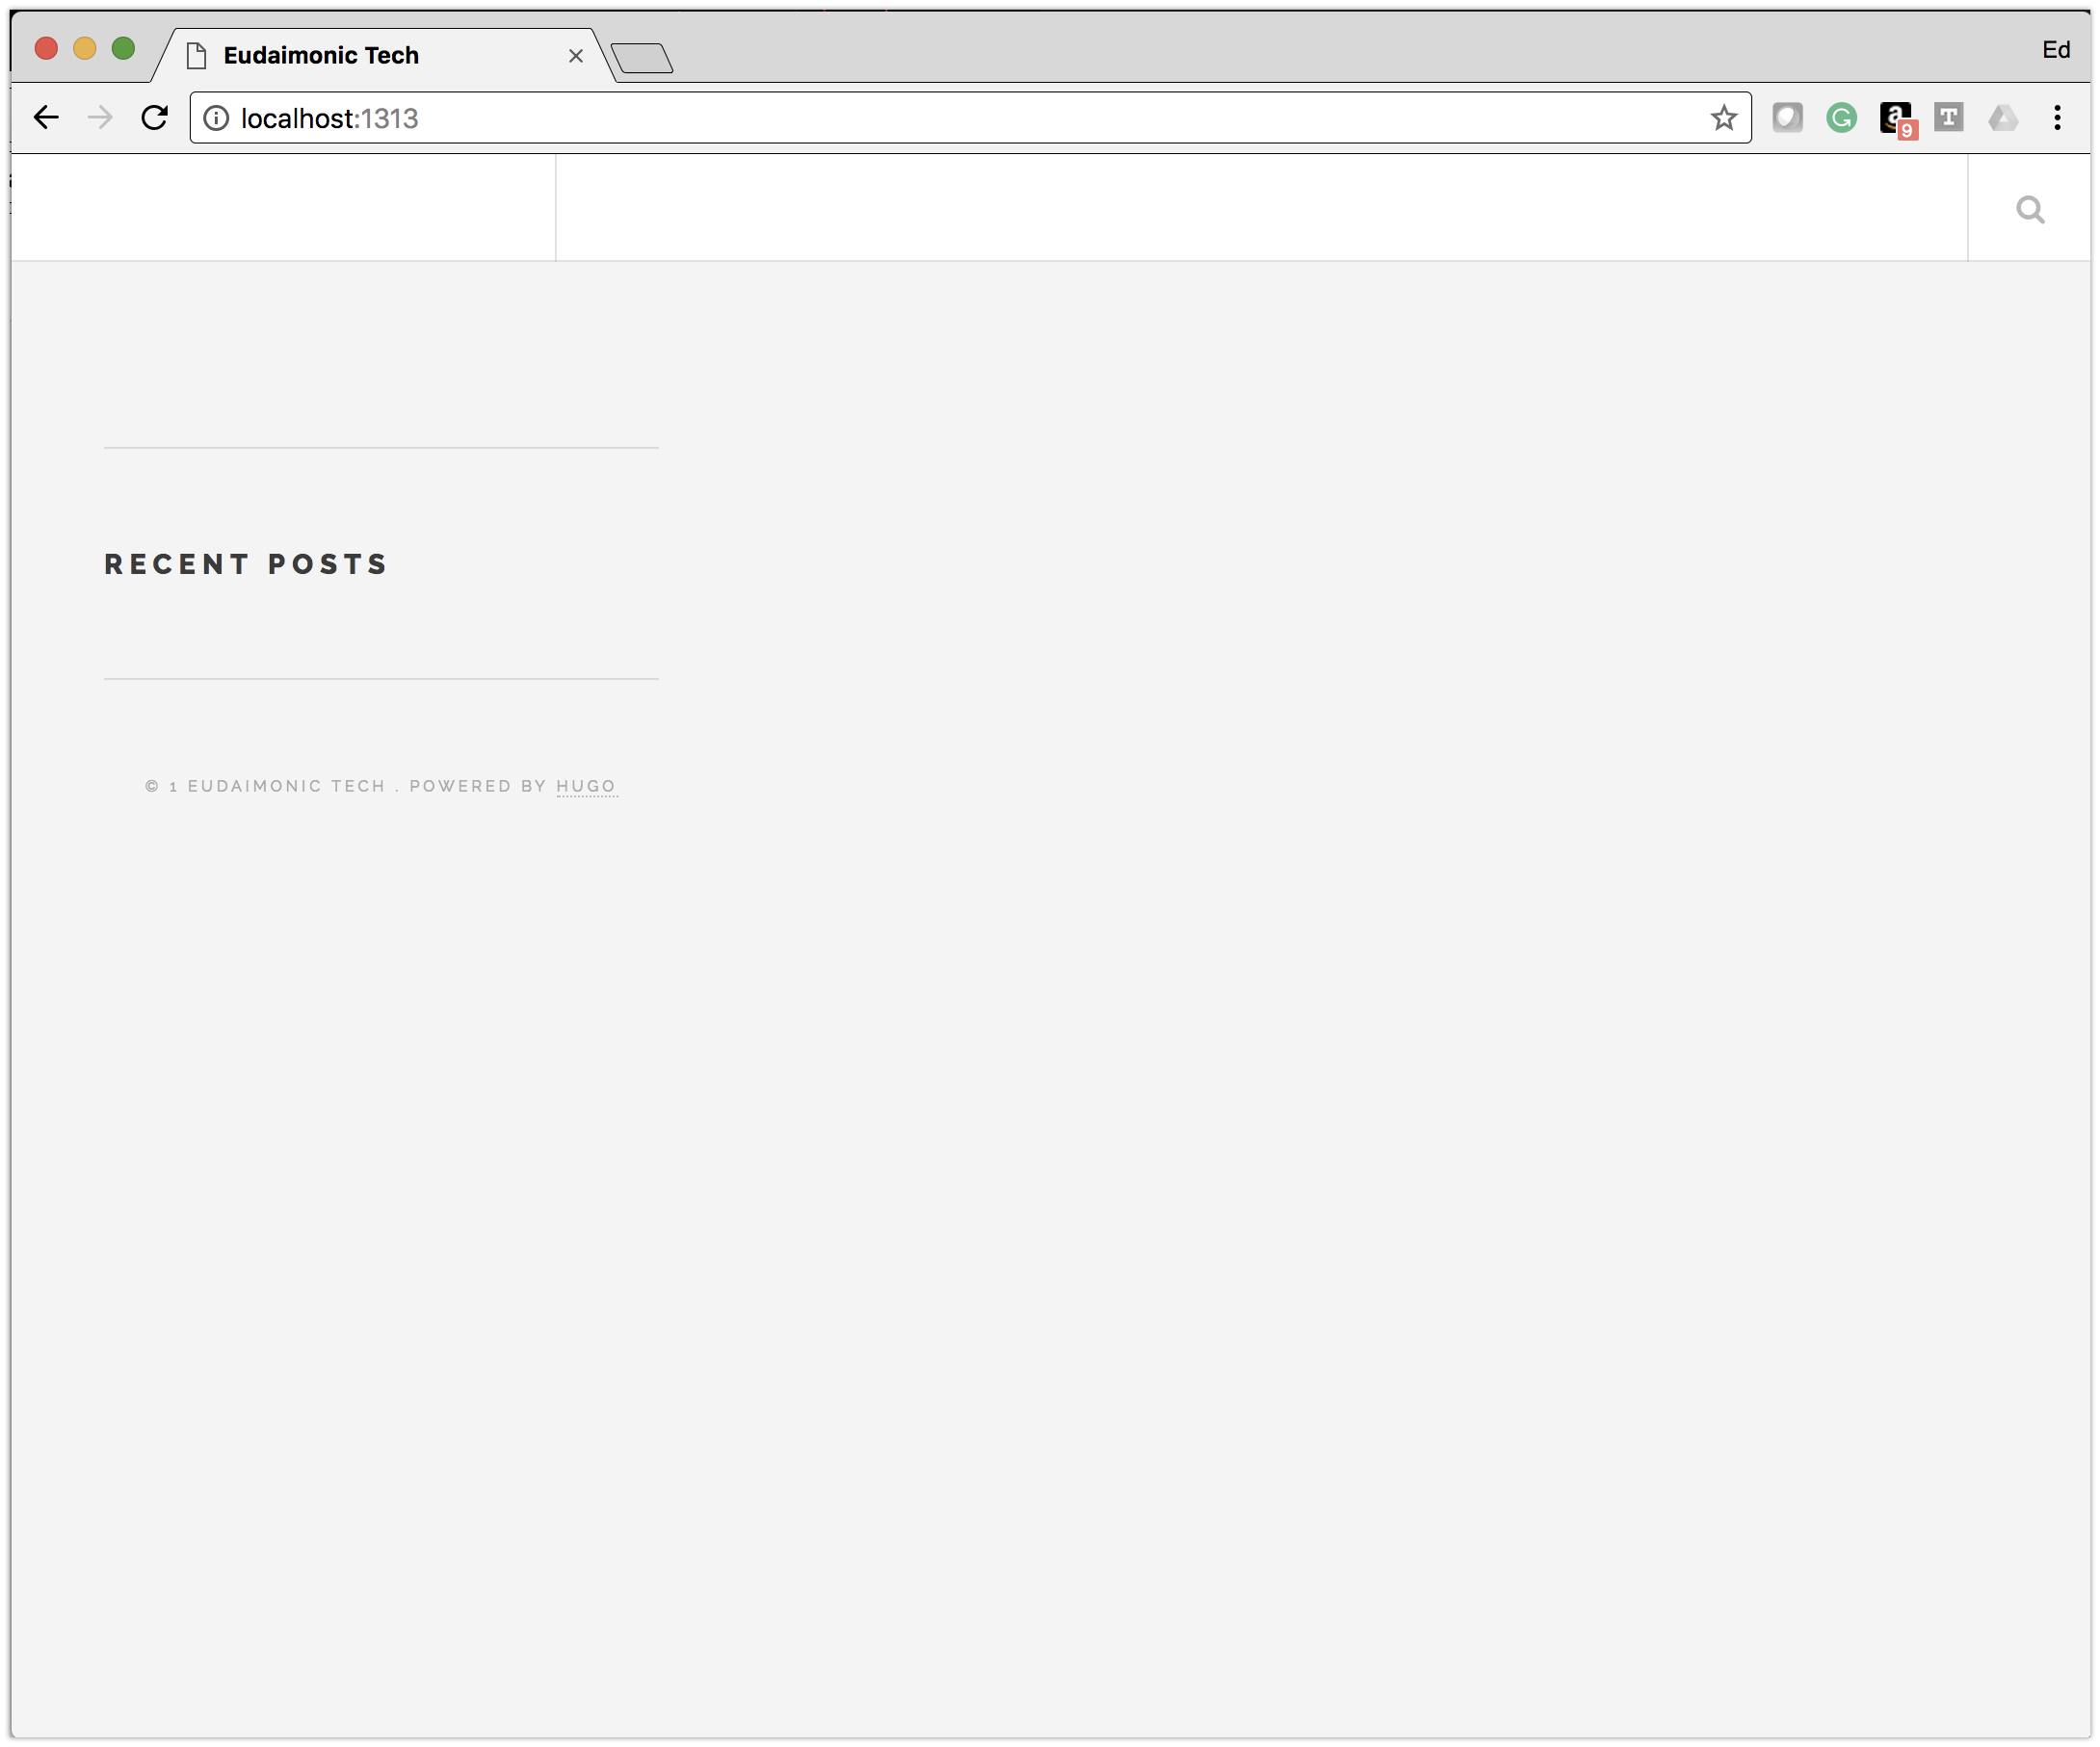
Wait you cry! That isn’t the beautiful blog layout I see before me! You are correct. Future Imperfect requires a fair bit of additional configuration to get what you see here. We’ll walk step by step through those changes needed to make the Hugo site feel like home.
Making the Hugo Site Feel Like Home
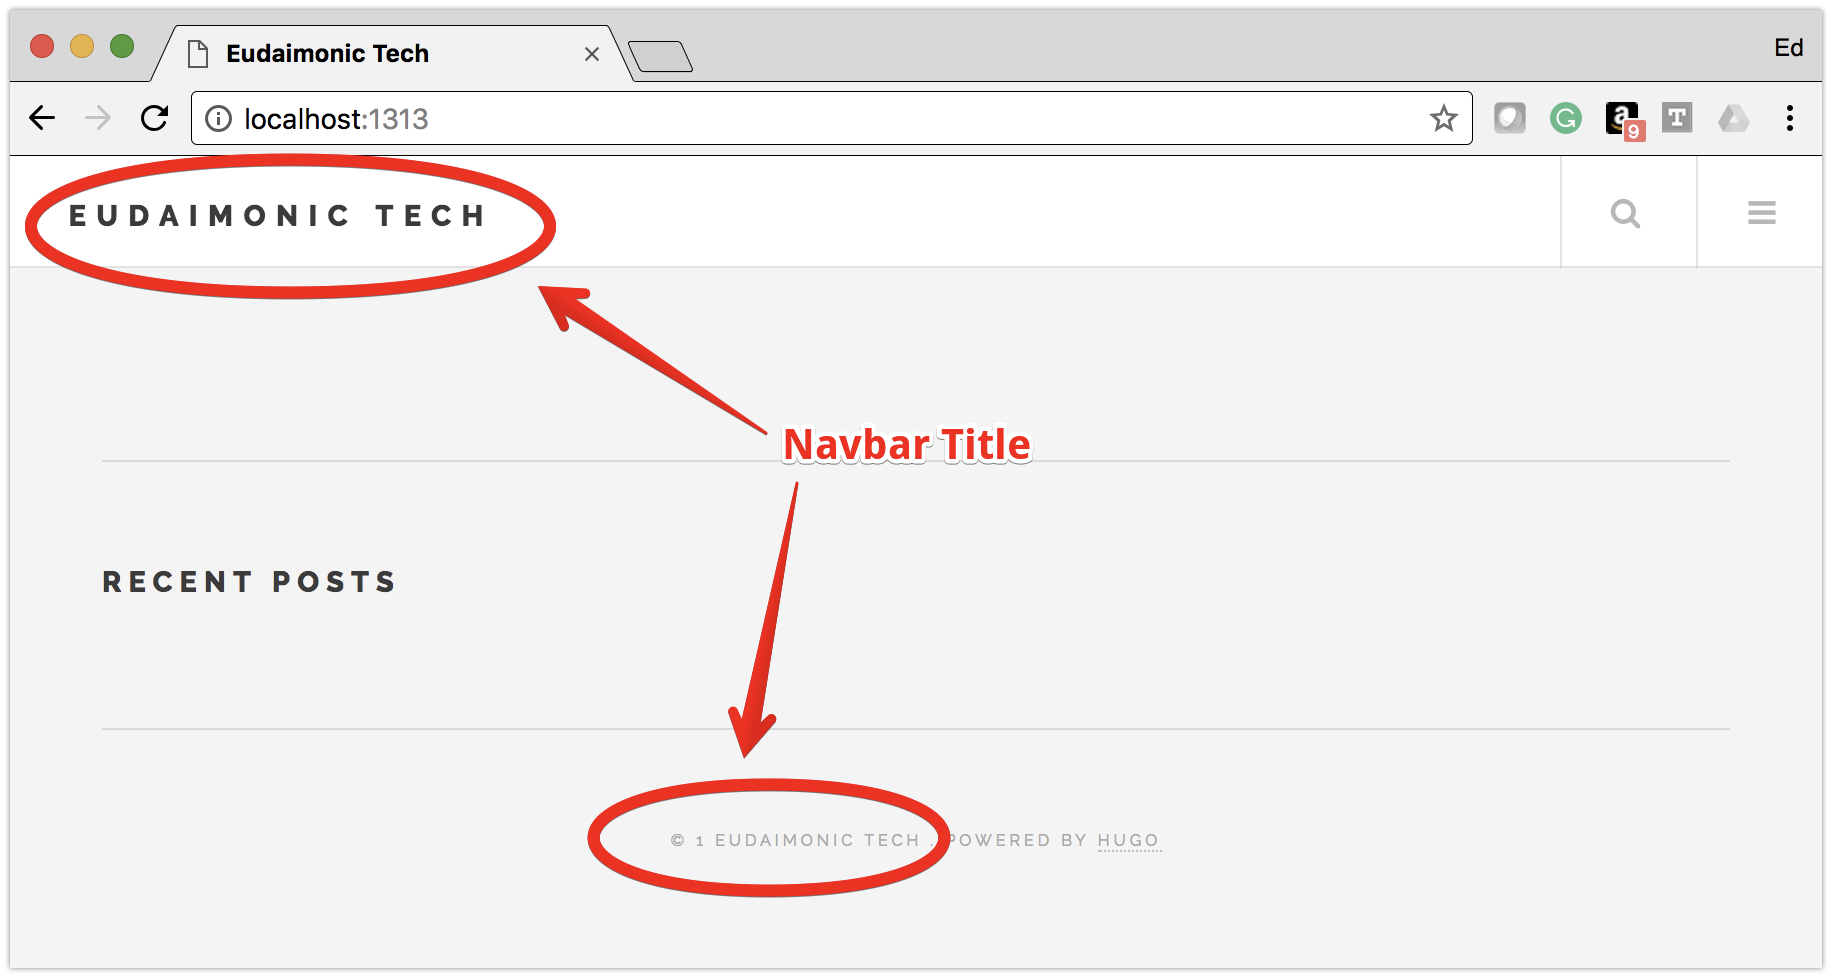
Configure the NavBar Title
cat << EOF >> config.toml
[params]
  # Sets the navbarTitle that appears in the top left of the navigation bar
  navbarTitle          = "Eudaimonic Tech"
EOF
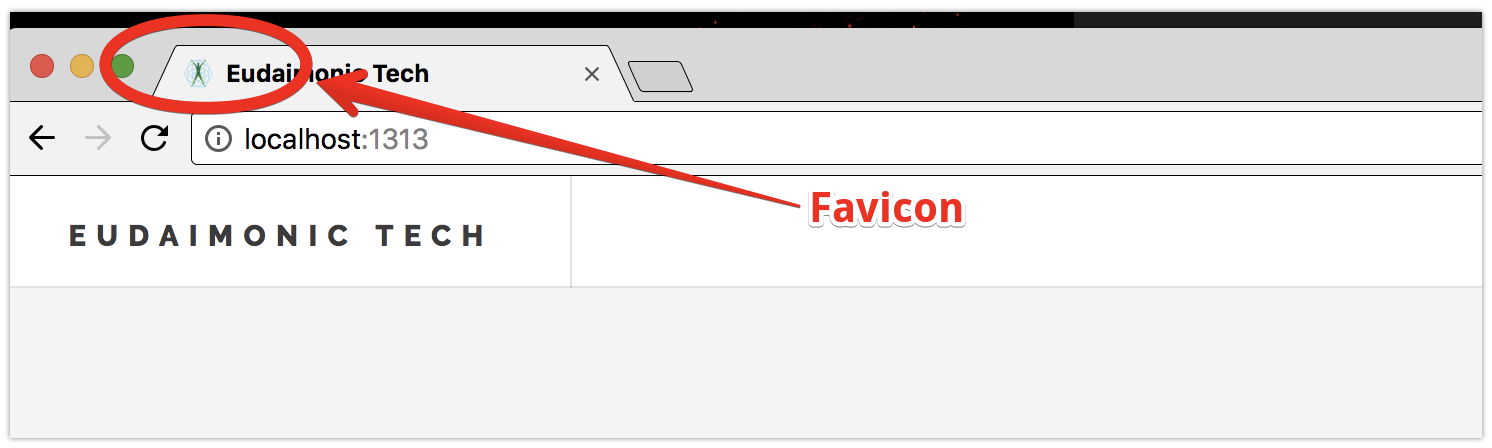
Add a Favicon
mkdir -p static/favicon
copy your favicon png to:
static/favicon/favicon-1.png
Add the following to your [params] section in your config.toml:
cat << EOF >> config.toml
  # https://github.com/audreyr/favicon-cheat-sheet
  loadFavicon          = true
  faviconVersion       = "1"
EOF
You may need to exit and restart your browser to see the favicon.
Adding the Socials
cat << EOF >> config.toml
  socialAppearAtTop    = true # Added to the [params] section
  socialAppearAtBottom = true # Added to the [params] section

[social]
  # Coding Communities
  github           = "edwarnicke"
  linkedin         = "edwarnicke"
  facebook         = "edwarnicke"
  twitter          = "edwarnicke"
  youtube          = "channel/UCfKkzlRvD_9r8zjcMtC9uDA?view_as=subscriber"
  gitlab           = ""
  stackoverflow    = "" # User Number
  bitbucket        = ""
  jsfiddle         = ""
  codepen          = ""
  # Visual Art Communities
  deviantart       = ""
  flickr           = ""
  behance          = ""
  dribbble         = ""
  # Publishing Communities
  wordpress        = ""
  medium           = ""
  # Professional/Business Oriented Communities
  linkedin_company = ""
  foursquare       = ""
  xing             = ""
  slideshare       = ""
  # Social Networks
  googleplus       = ""
  reddit           = ""
  quora            = ""
  vimeo            = ""
  whatsapp         = "" # WhatsApp Number
    # WeChat and QQ need testing.
    wechat         = ""
    qq             = "" # User ID Number
  instagram        = ""
  tumblr           = ""
  skype            = ""
  snapchat         = ""
  pinterest        = ""
  telegram         = ""
  vine             = ""
  googlescholar    = ""
  orcid            = ""
  researchgate     = ""
  # Email
  email            = ""
EOF
![]()
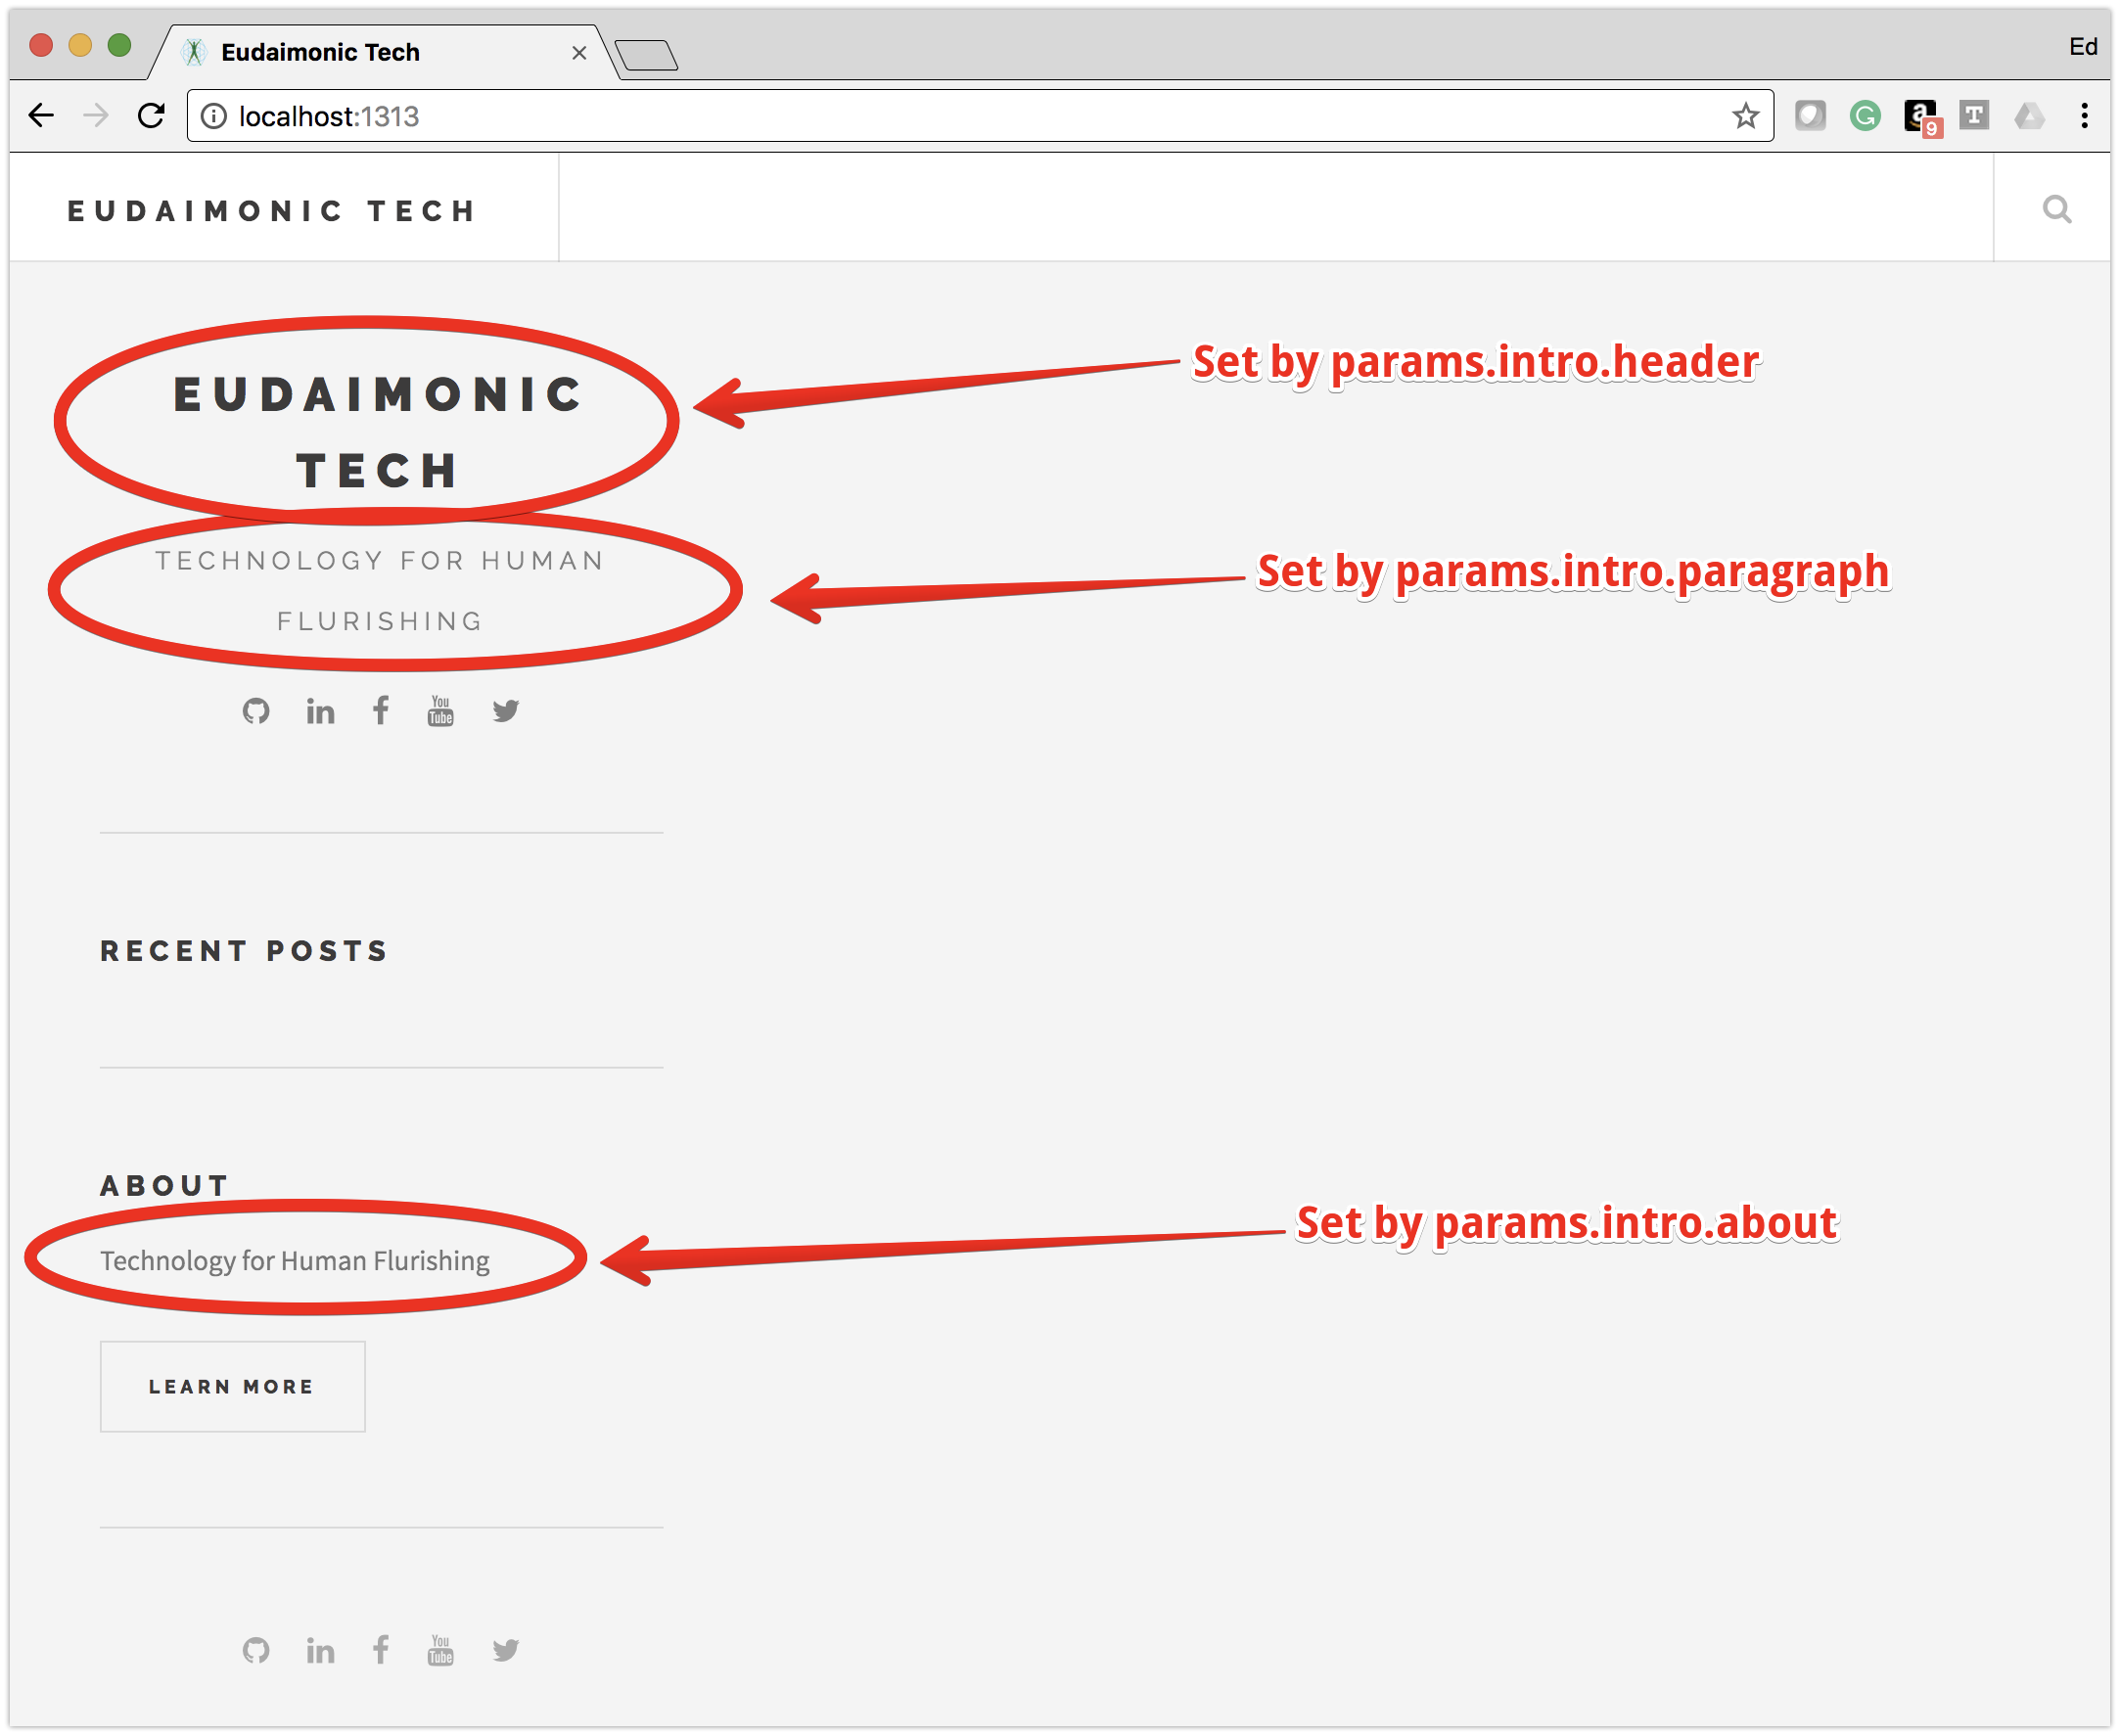
Configure the NavBar Intro
cat << EOF >> config.toml
[params.intro]
  header    = "Eudaimonic Tech"
  paragraph = "Technology for Human Flourishing"
  about     = "Technology for Human Flourishing"
EOF
Configure a Logo
Make an image directory in static/ :
mkdir -p static/img
Copy your logo into static/img/. For me that is:
static/img/eudaimonic.tech.logo.svg
To add a logo to your site, we will need to add some parameters to the config.toml.
cat << EOF >> config.toml
[params.intro.pic]
  src       = "img/eudaimonic.tech.logo.svg"
  width     = "150px"
  alt       = "Eudaimonic Tech"
EOF
![]()
Add a ‘Blog’ section
cat << EOF >> config.toml
# Sets the menu items in the navigation bar
# Identifier prepends a Font Awesome icon to the menu item
[[menu.main]]
  name = "Blog"
  url = "/blog/"
  identifier = "fa fa-newspaper-o"
  weight = 1
EOF
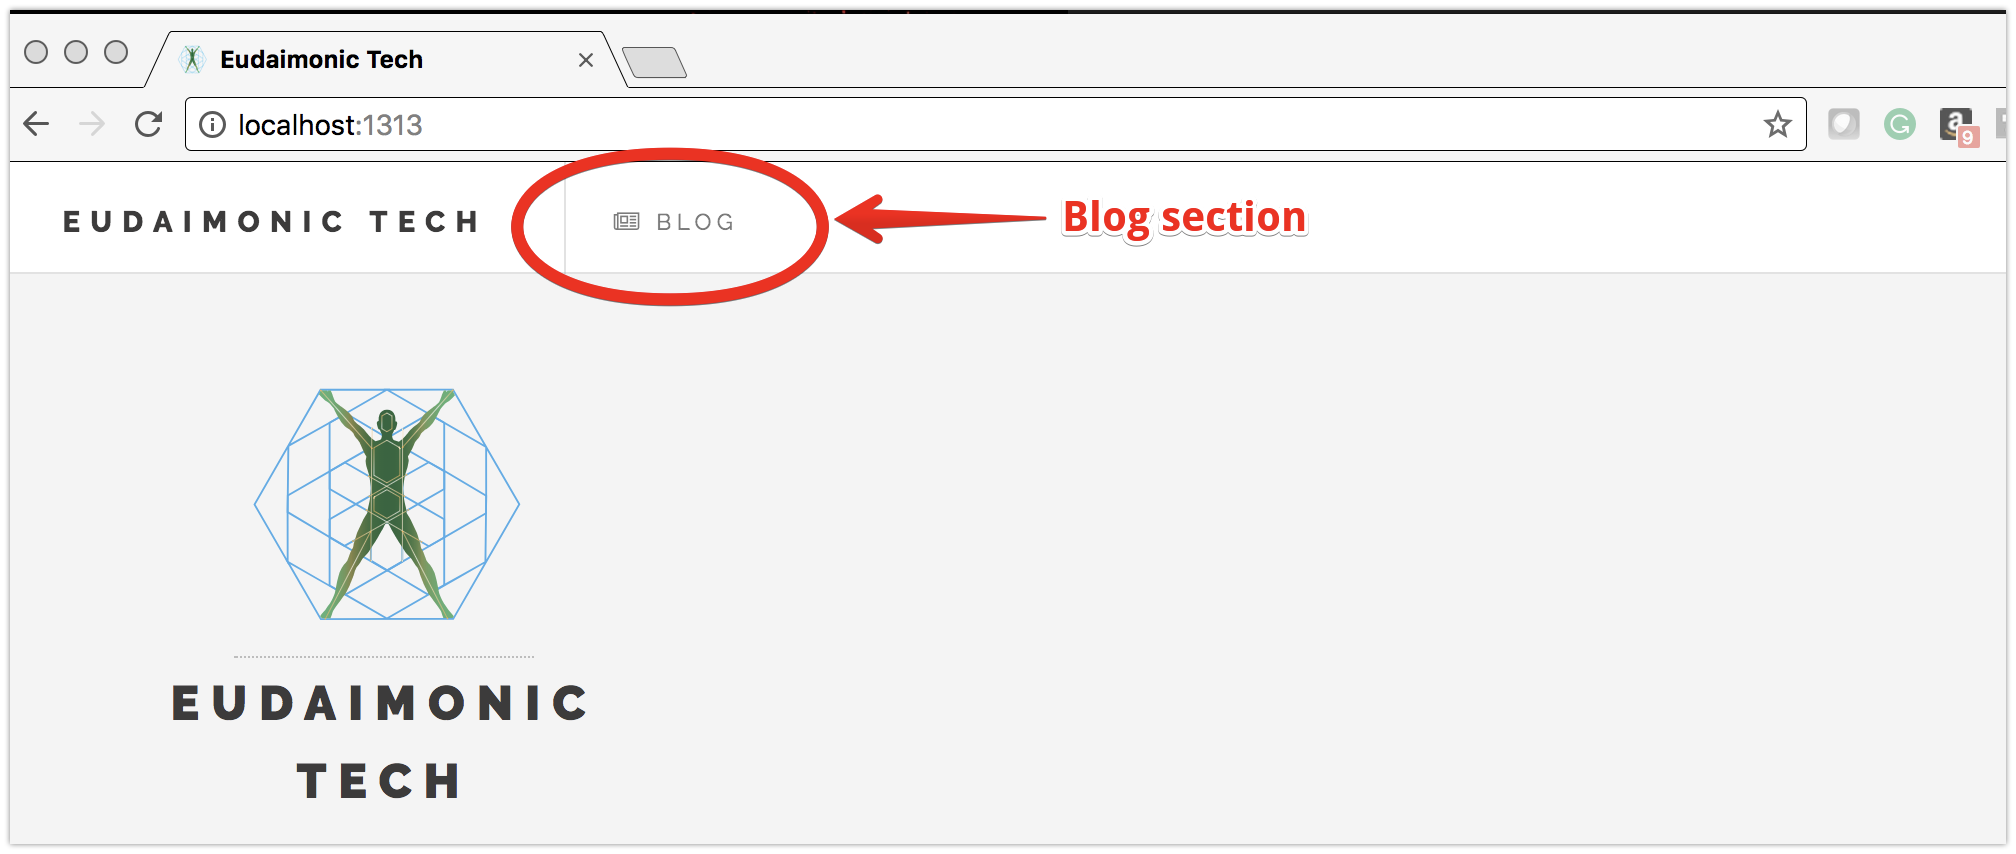
NOTE: Clicking the “Blog” section in the header will yield a 404, as we have no blog entries yet.
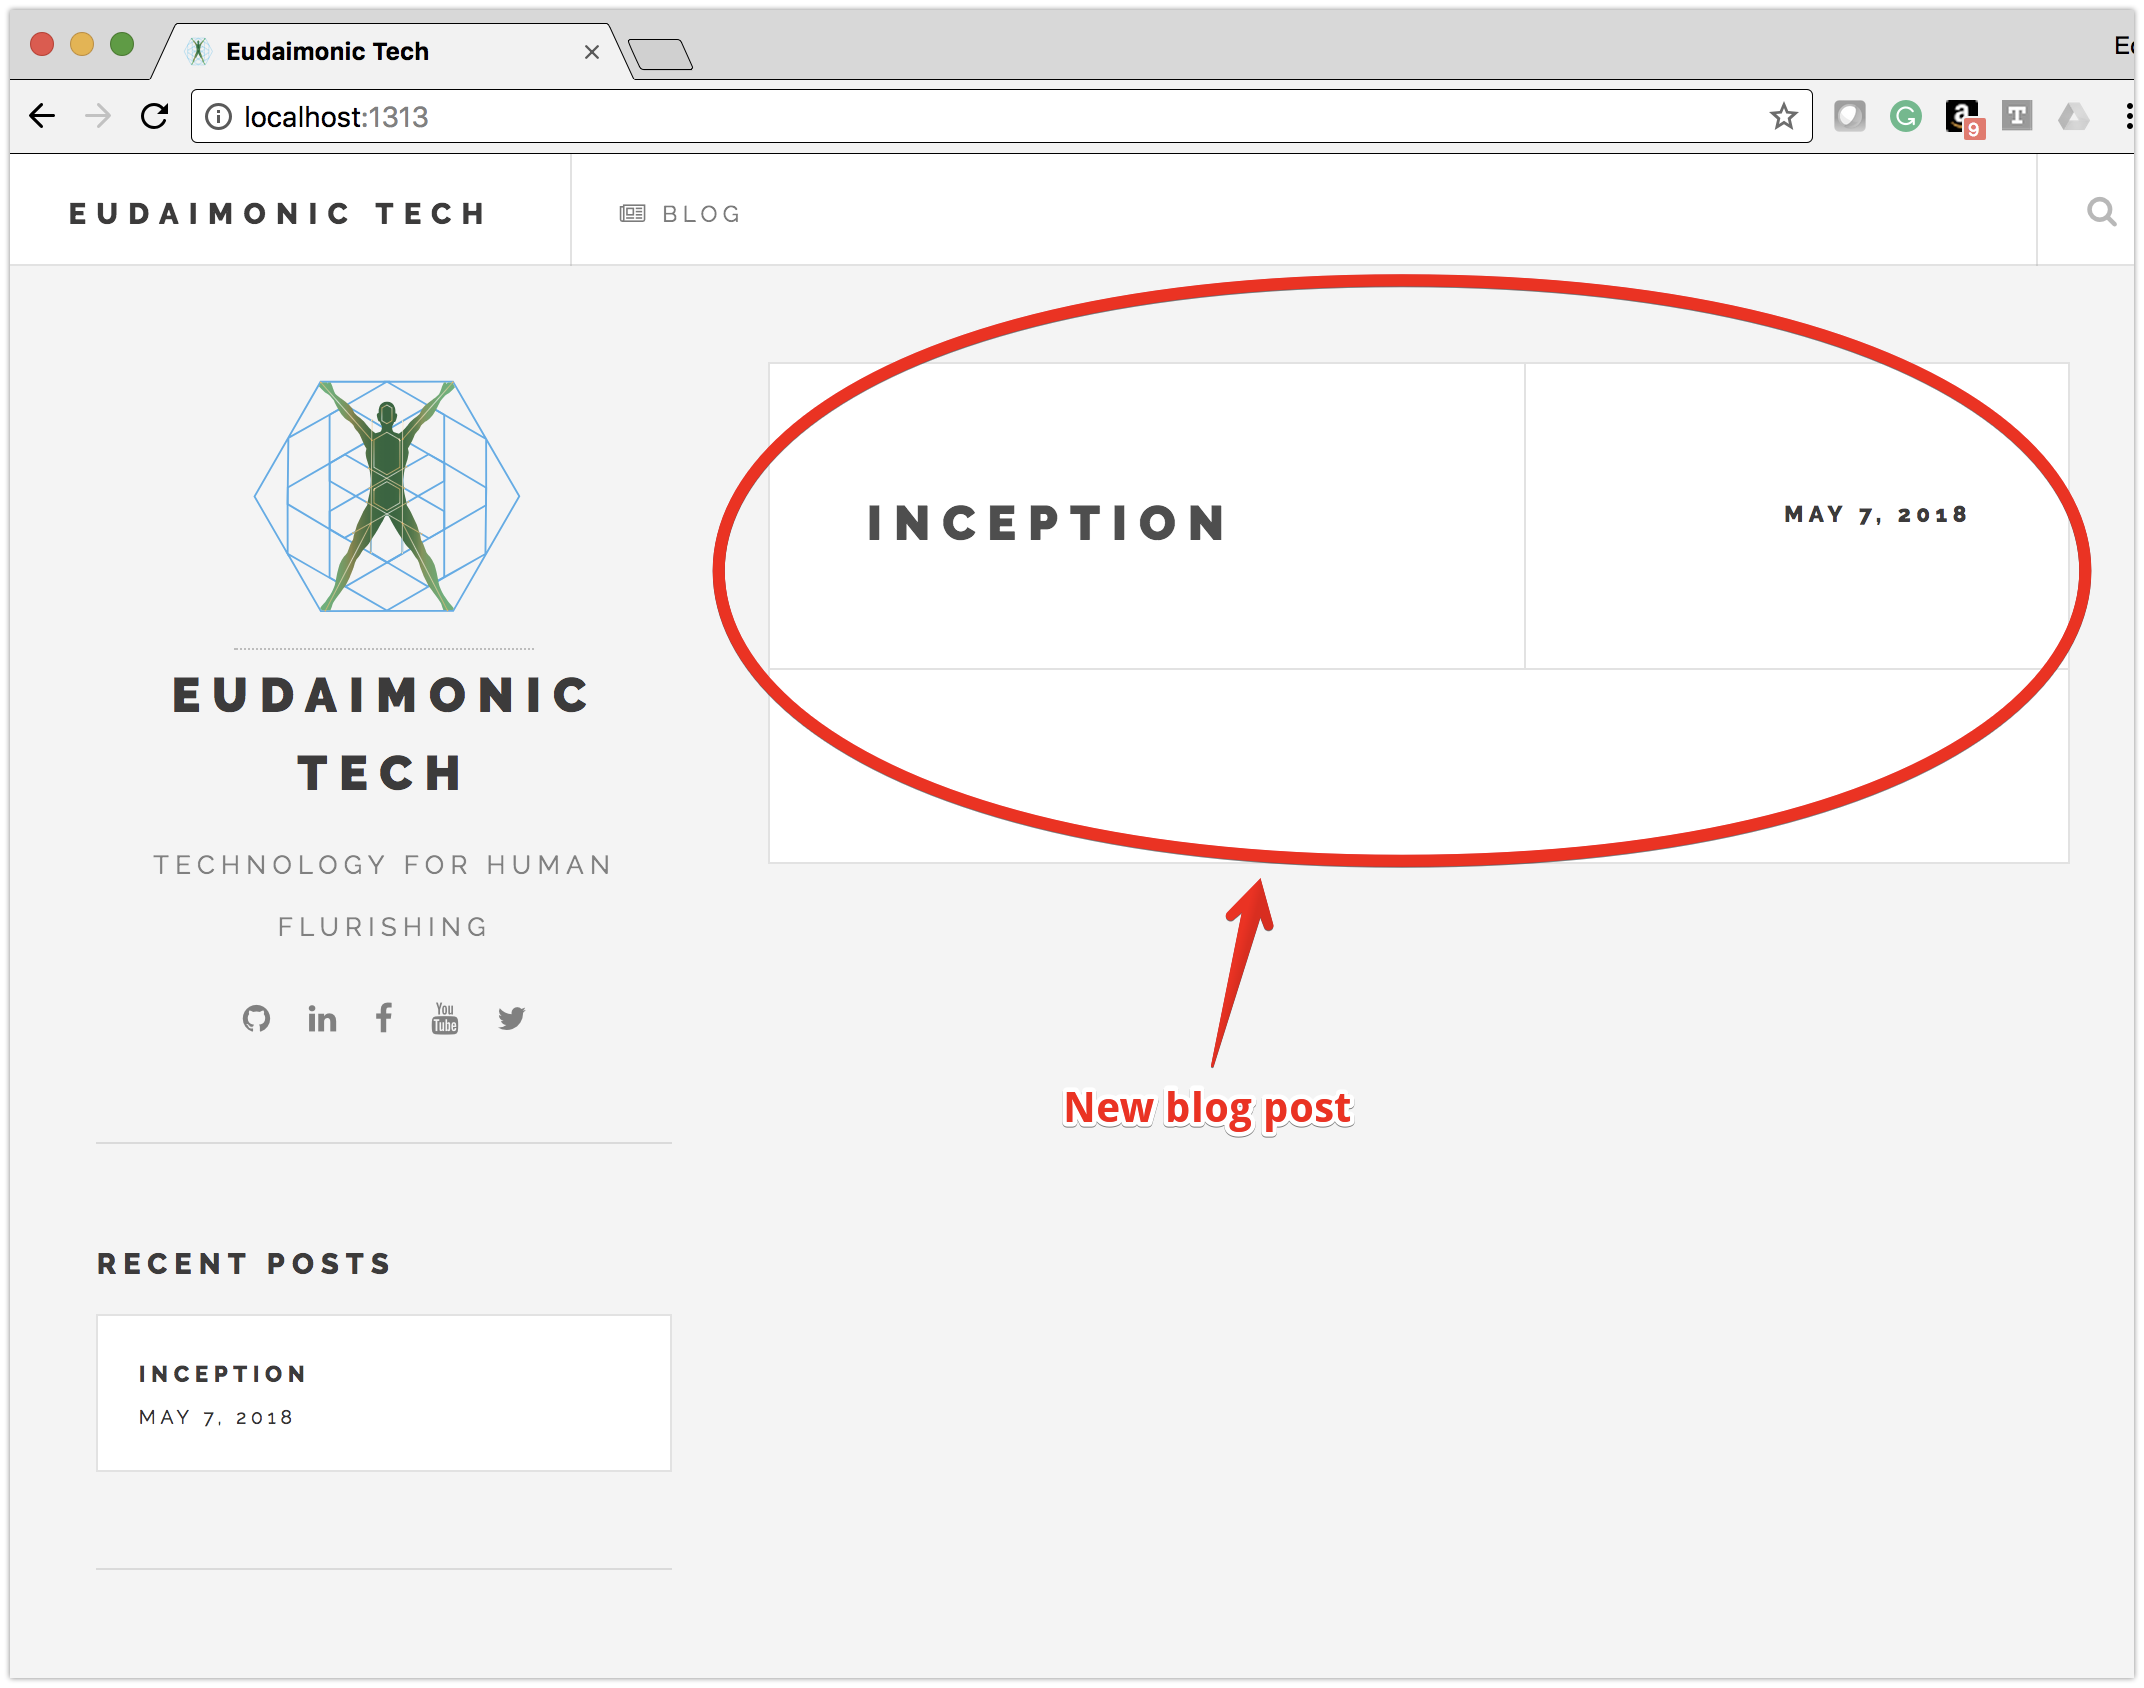
Create ‘Inception’ blog post
hugo new blog/inception.md
Which will create
content/blog/inception.md
And start it out with content:
---
title: "Inception"
date: 2018-05-07T13:57:58-05:00
draft: true
---
You will need to edit the front matter to add ‘type=post’ so it looks like:
---
title: "Inception"
date: 2018-05-07T13:57:58-05:00
type: post
---
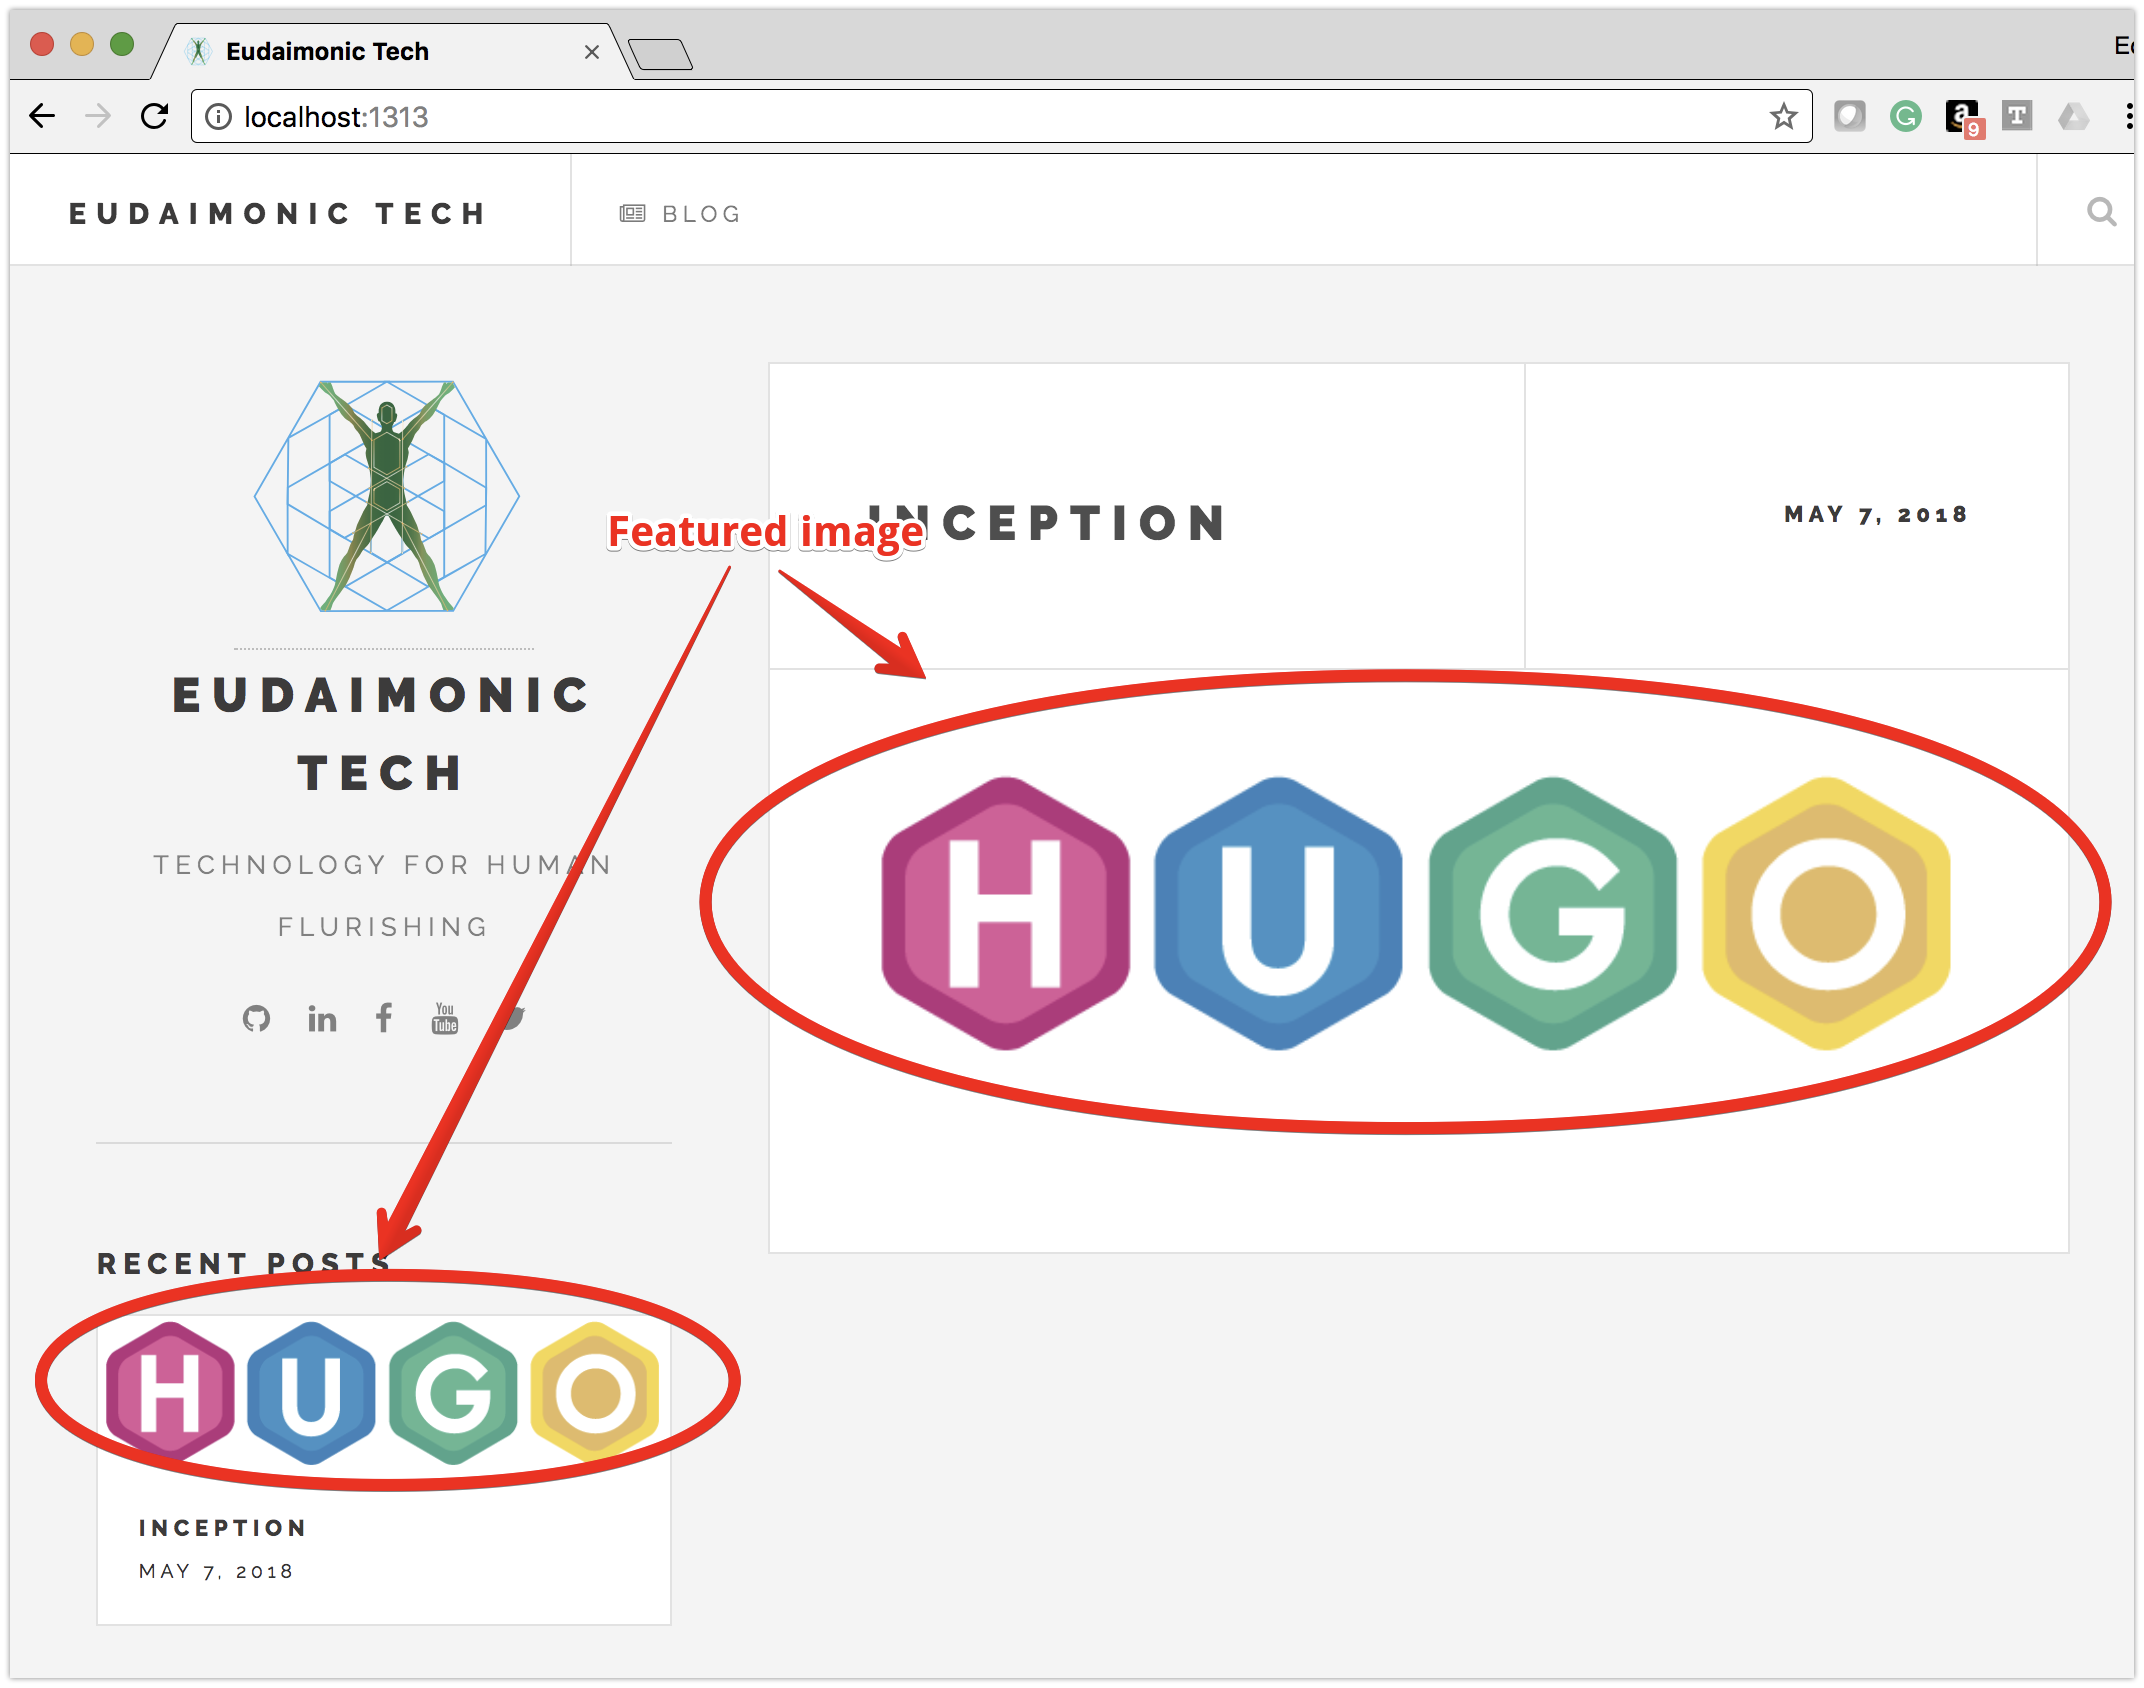
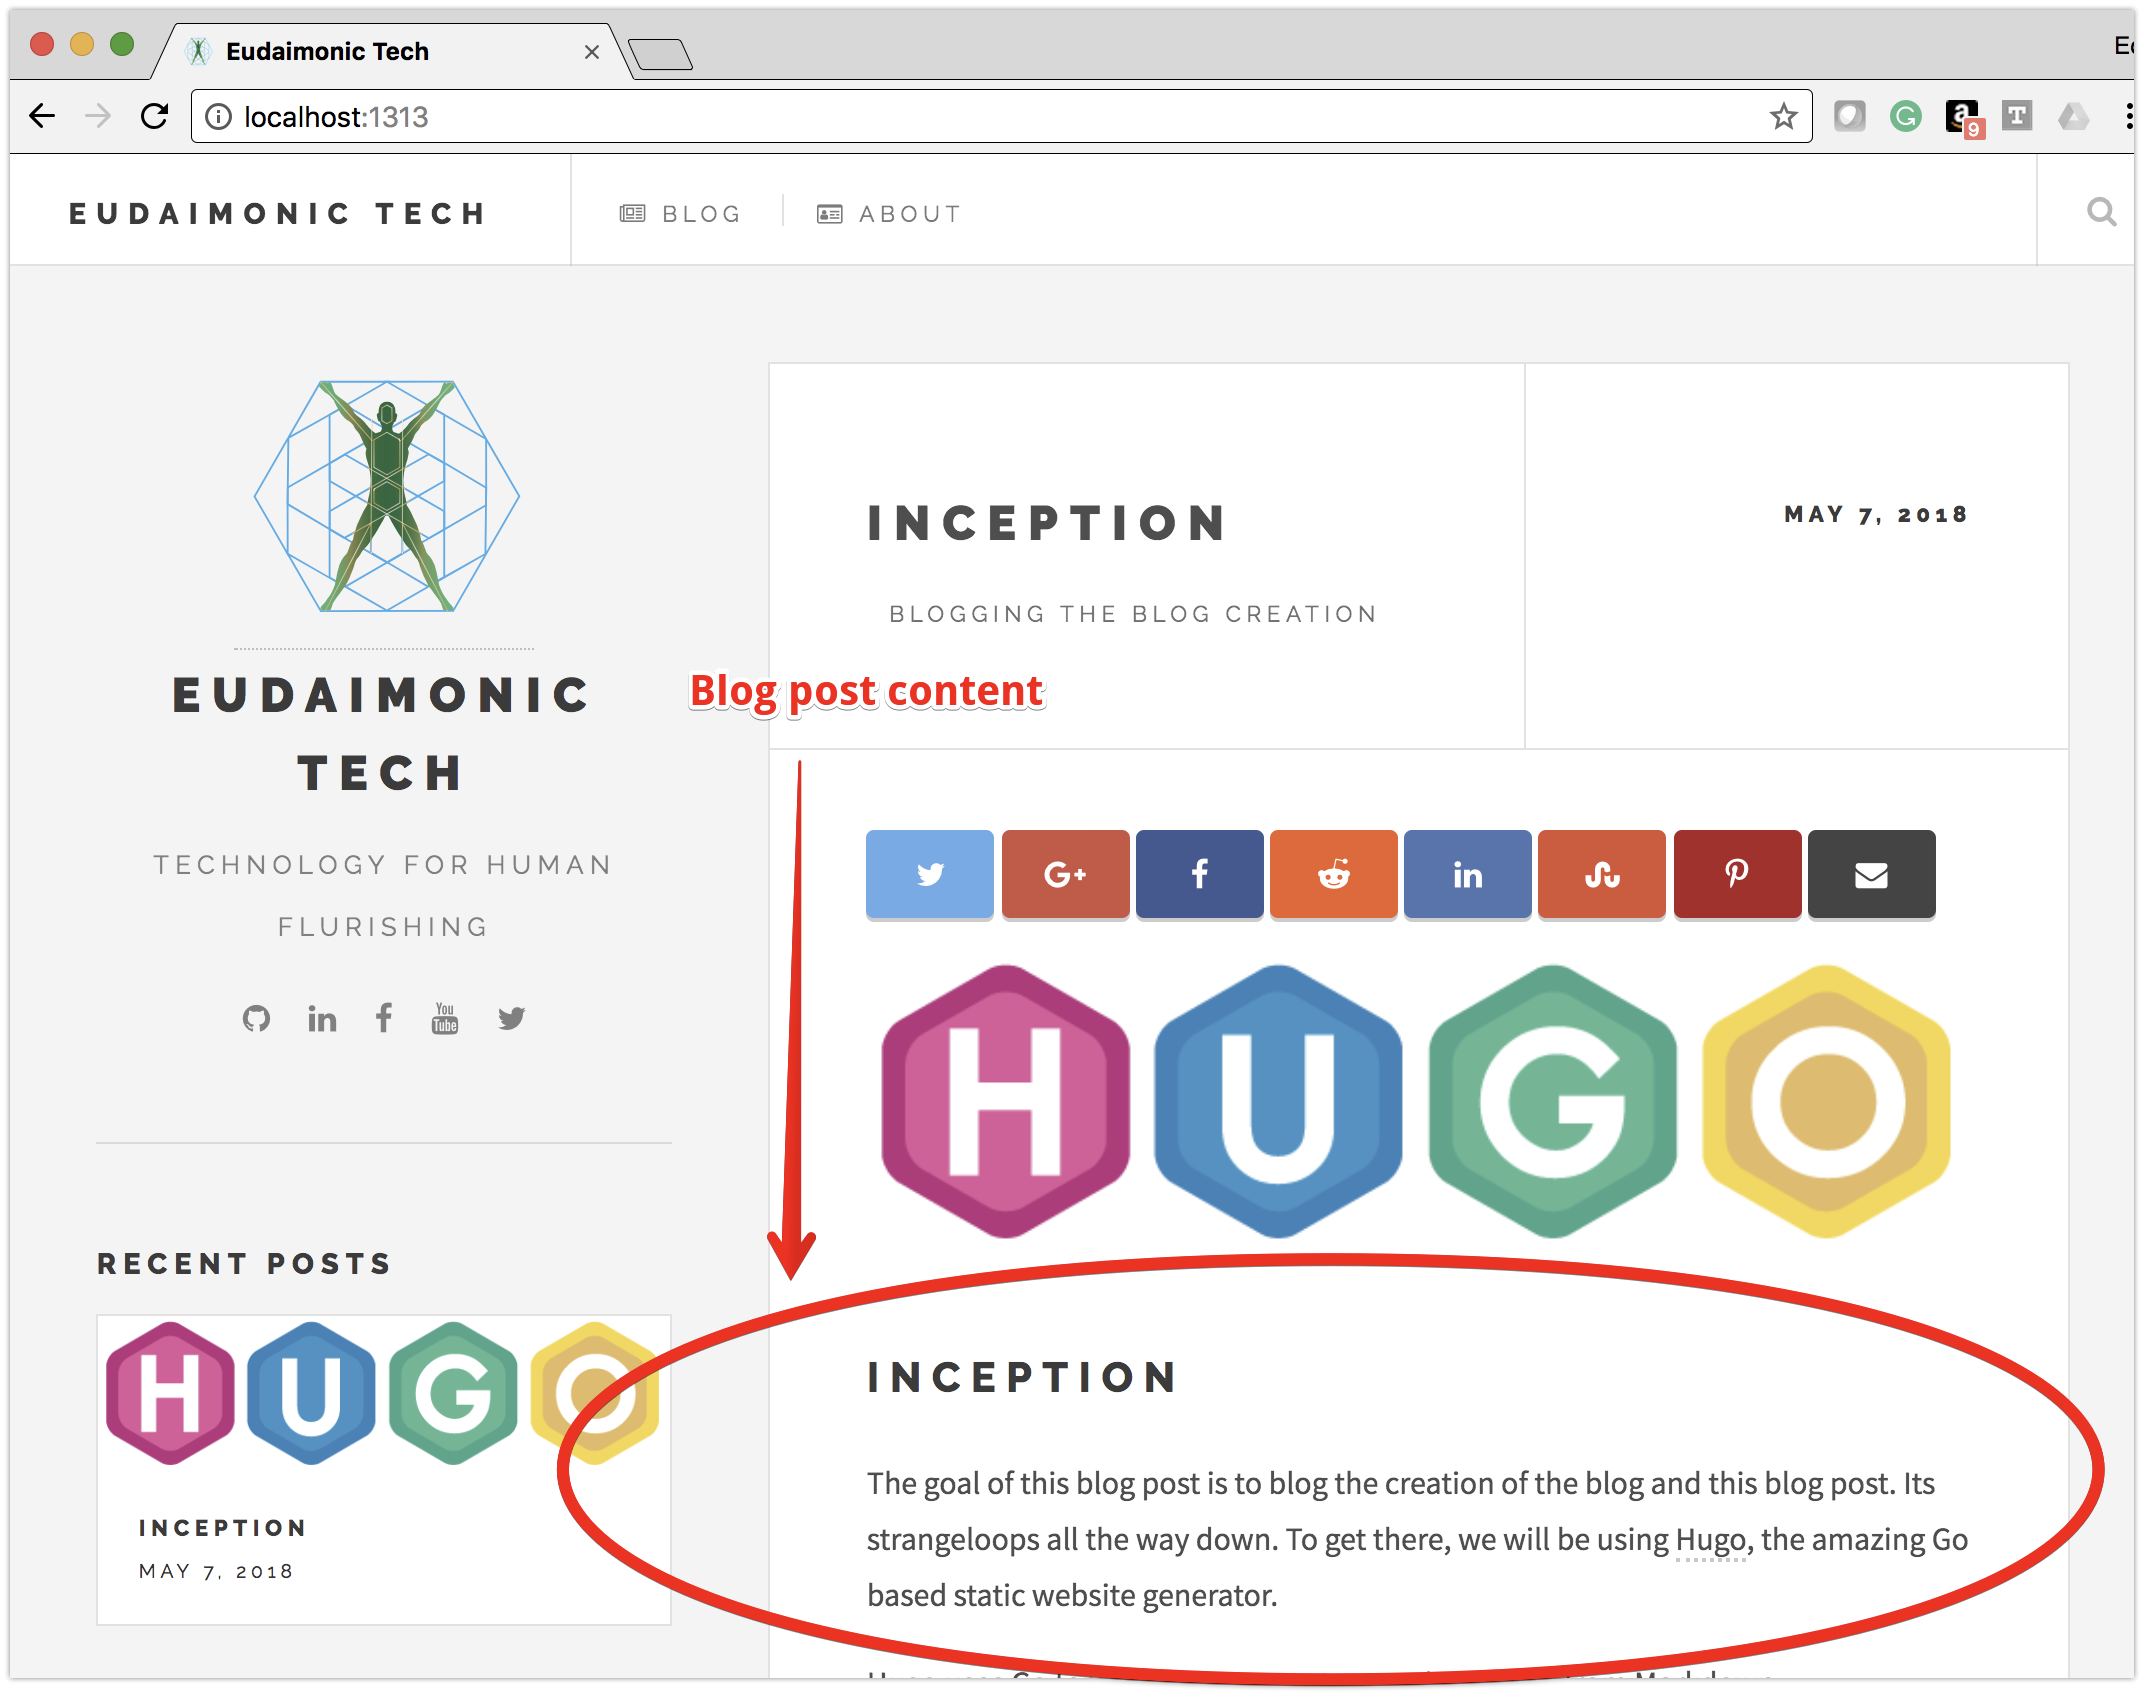
Add a feature image to ‘Inception’ blog post
Create a directory for your post’s images
mkdir -p static/img/inception
Copy your blog posts image to:
static/img/inception/hugo-logo.png
You will need to edit the front matter to add:
featured: hugo-logo.png
featuredalt: "Hugo Logo"
featuredpath: /img/inception/
So it looks like:
---
title: "Inception"
date: 2018-05-07T13:57:58-05:00
featured: hugo-logo.png
featuredalt: "Hugo Logo"
featuredpath: /img/inception/
type: post
---
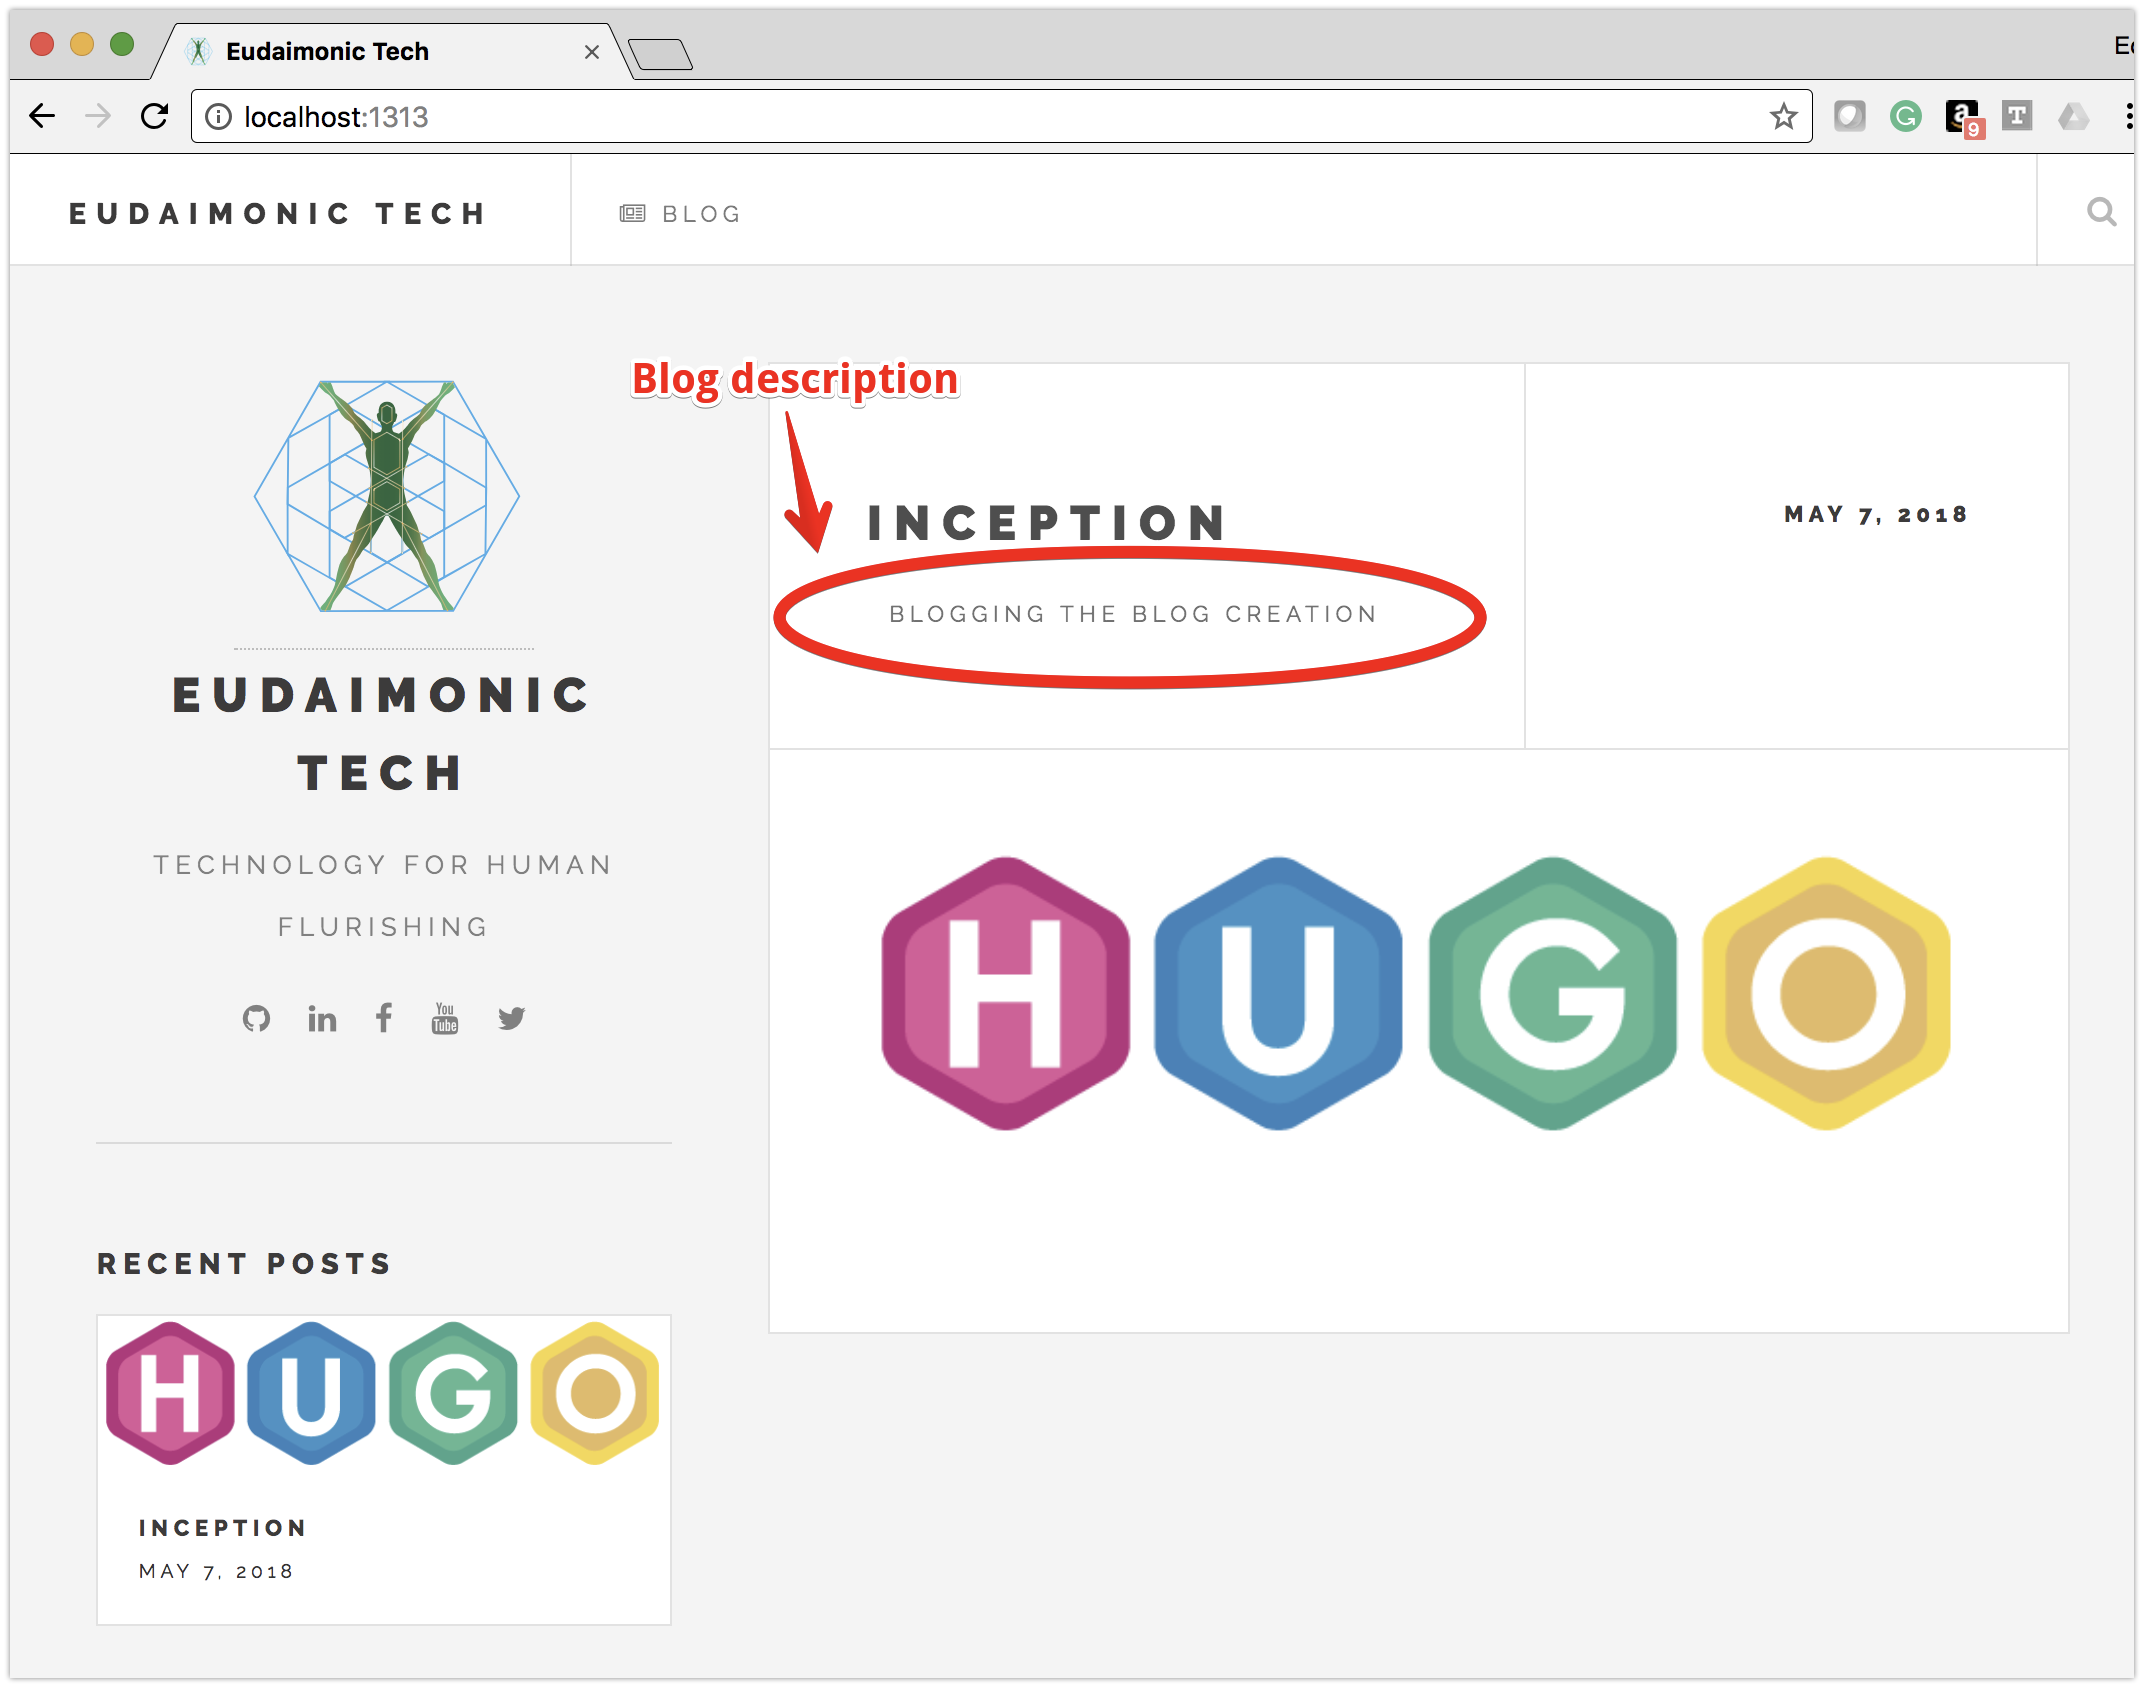
Add a description to ‘Inception’ blog post
Add to the front matter for your blog post:
description: "Blogging the Blog Creation"
So it looks like:
---
title: "Inception"
description: "Blogging the Blog Creation"
date: 2018-05-07T13:57:58-05:00
featured: hugo-logo.png
featuredalt: "Hugo Logo"
featuredpath: /img/inception/
type: post
---
Add Social Media Share Buttons to blog posts
Add to your config.toml [params] section
  # Sets Social Share links to appear on posts
  socialShare          = true
  # Sets specific share to appear on posts (default behavior is to appear)
  socialShareTwitter   = true
  socialShareFacebook  = true
  socialShareLinkedin  = true
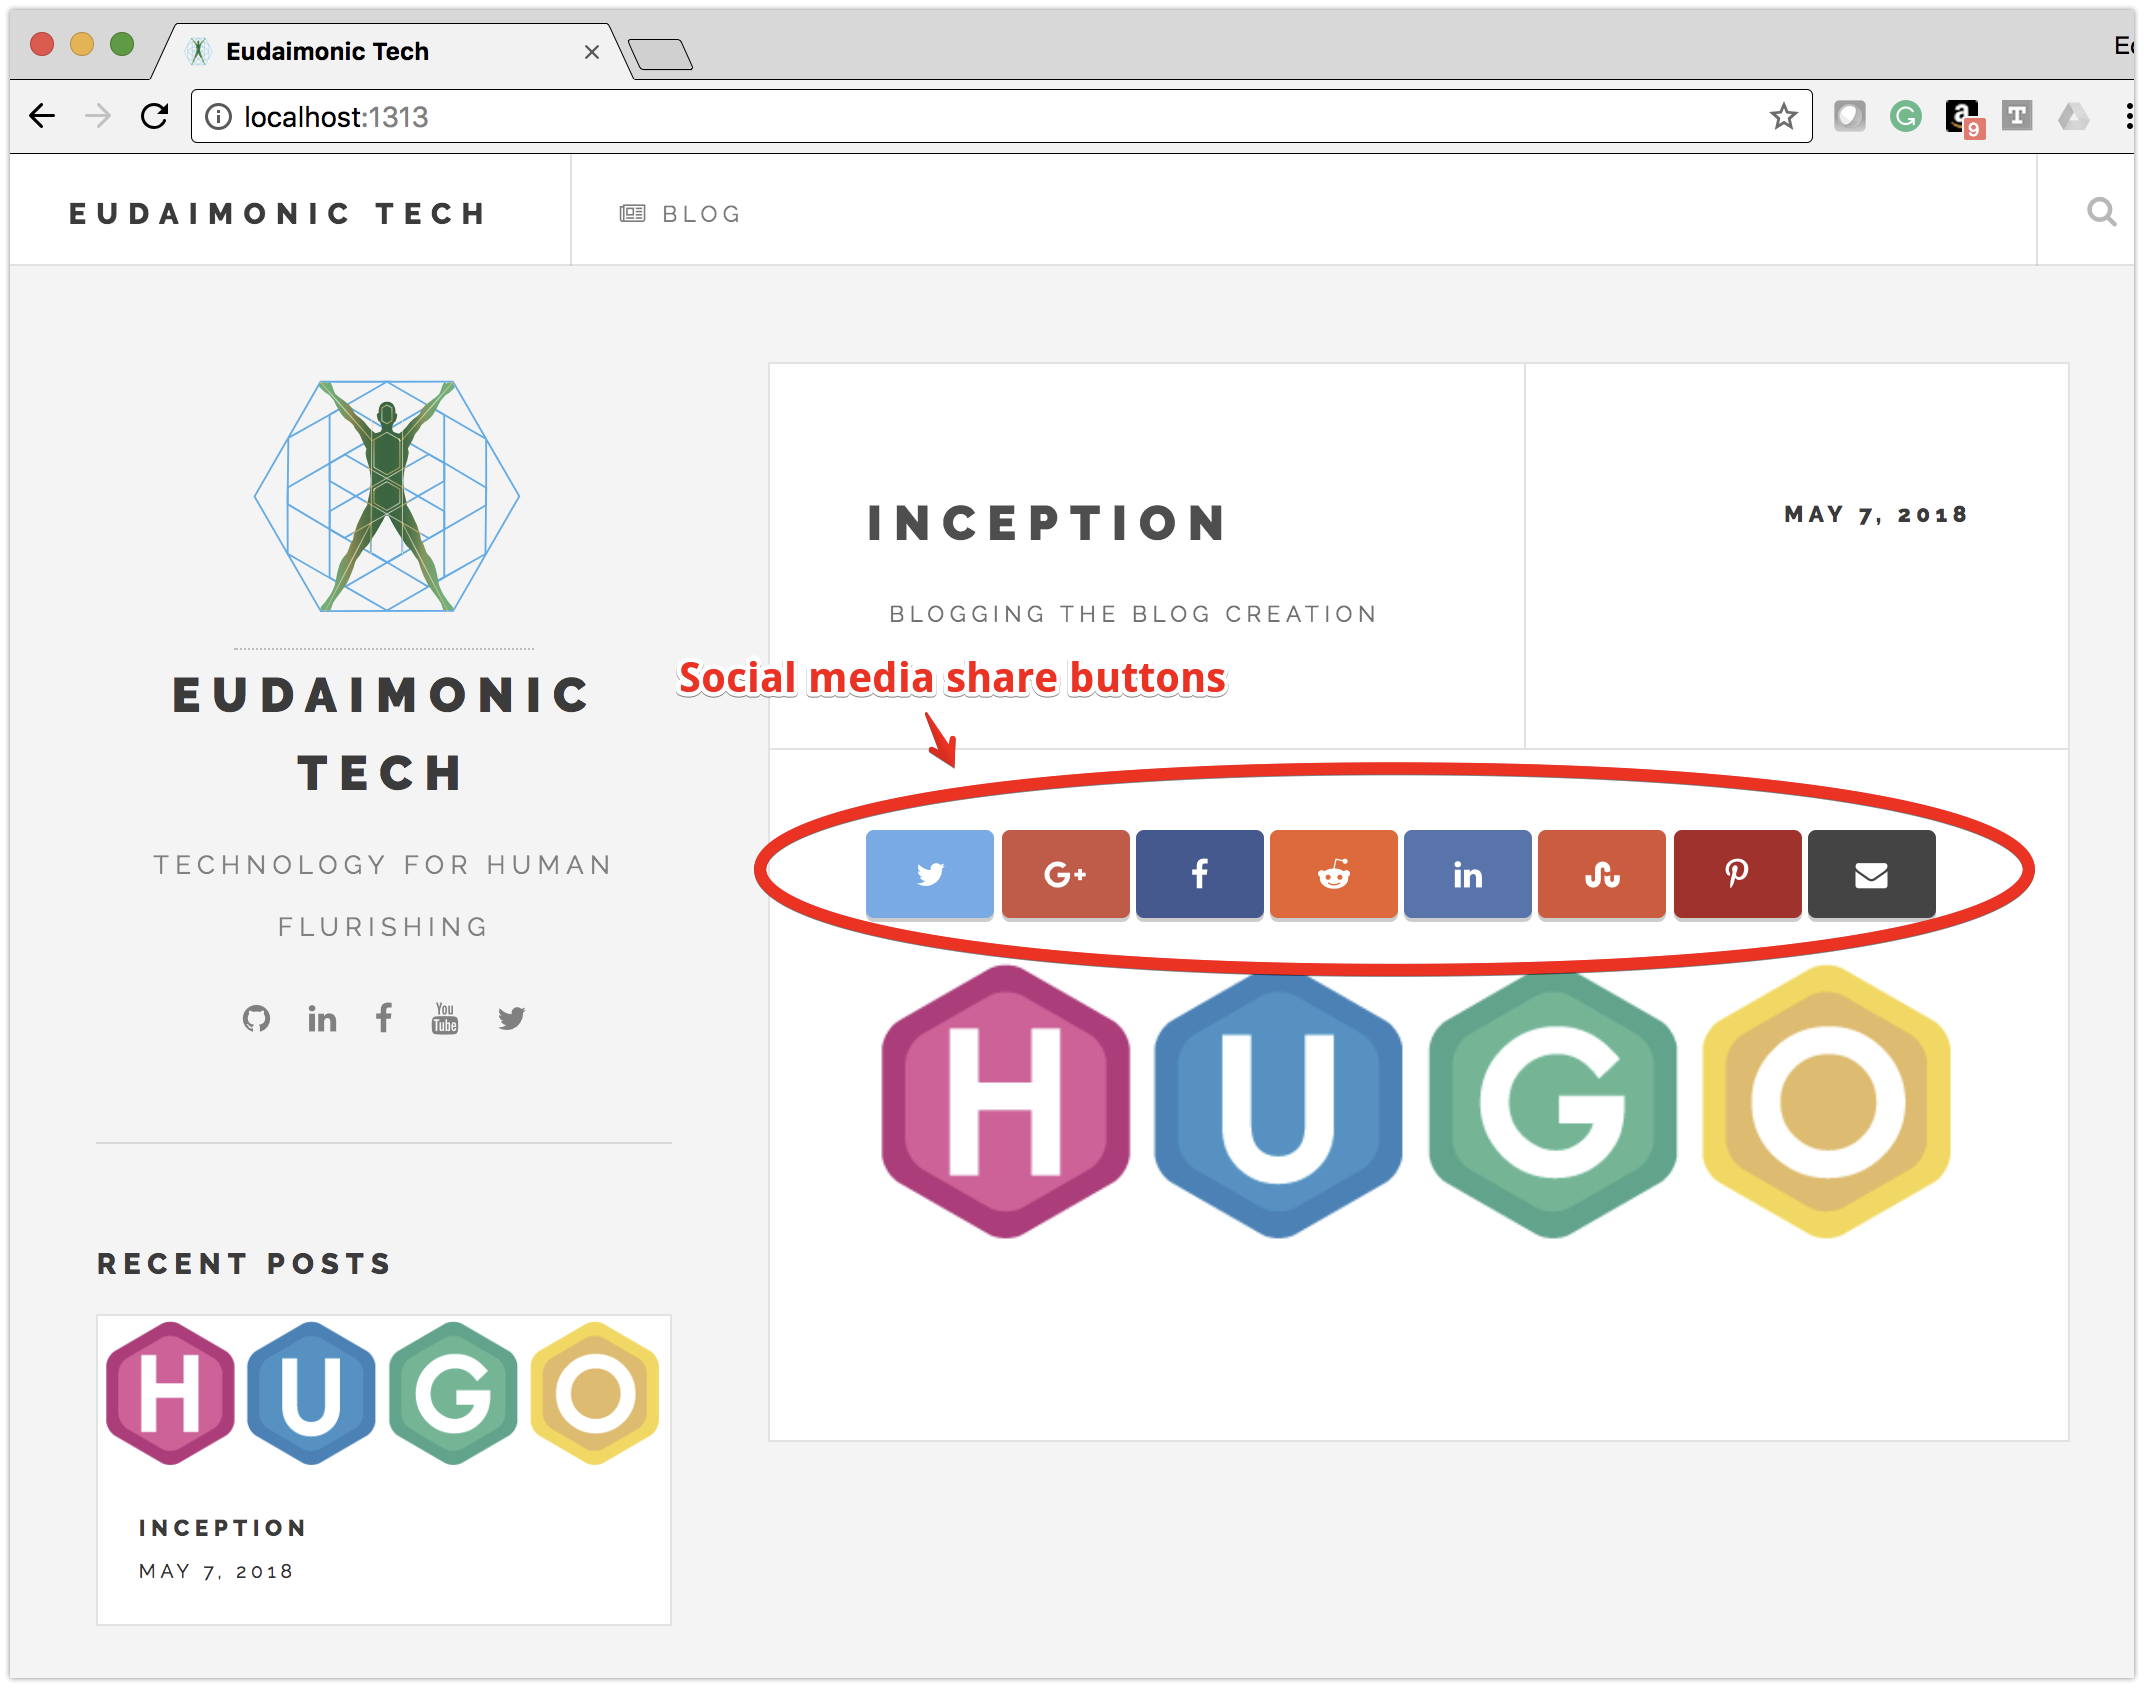
Add content to the blog post
Content in Hugo is written after the front matter (the stuff between —) and is written in Markdown:
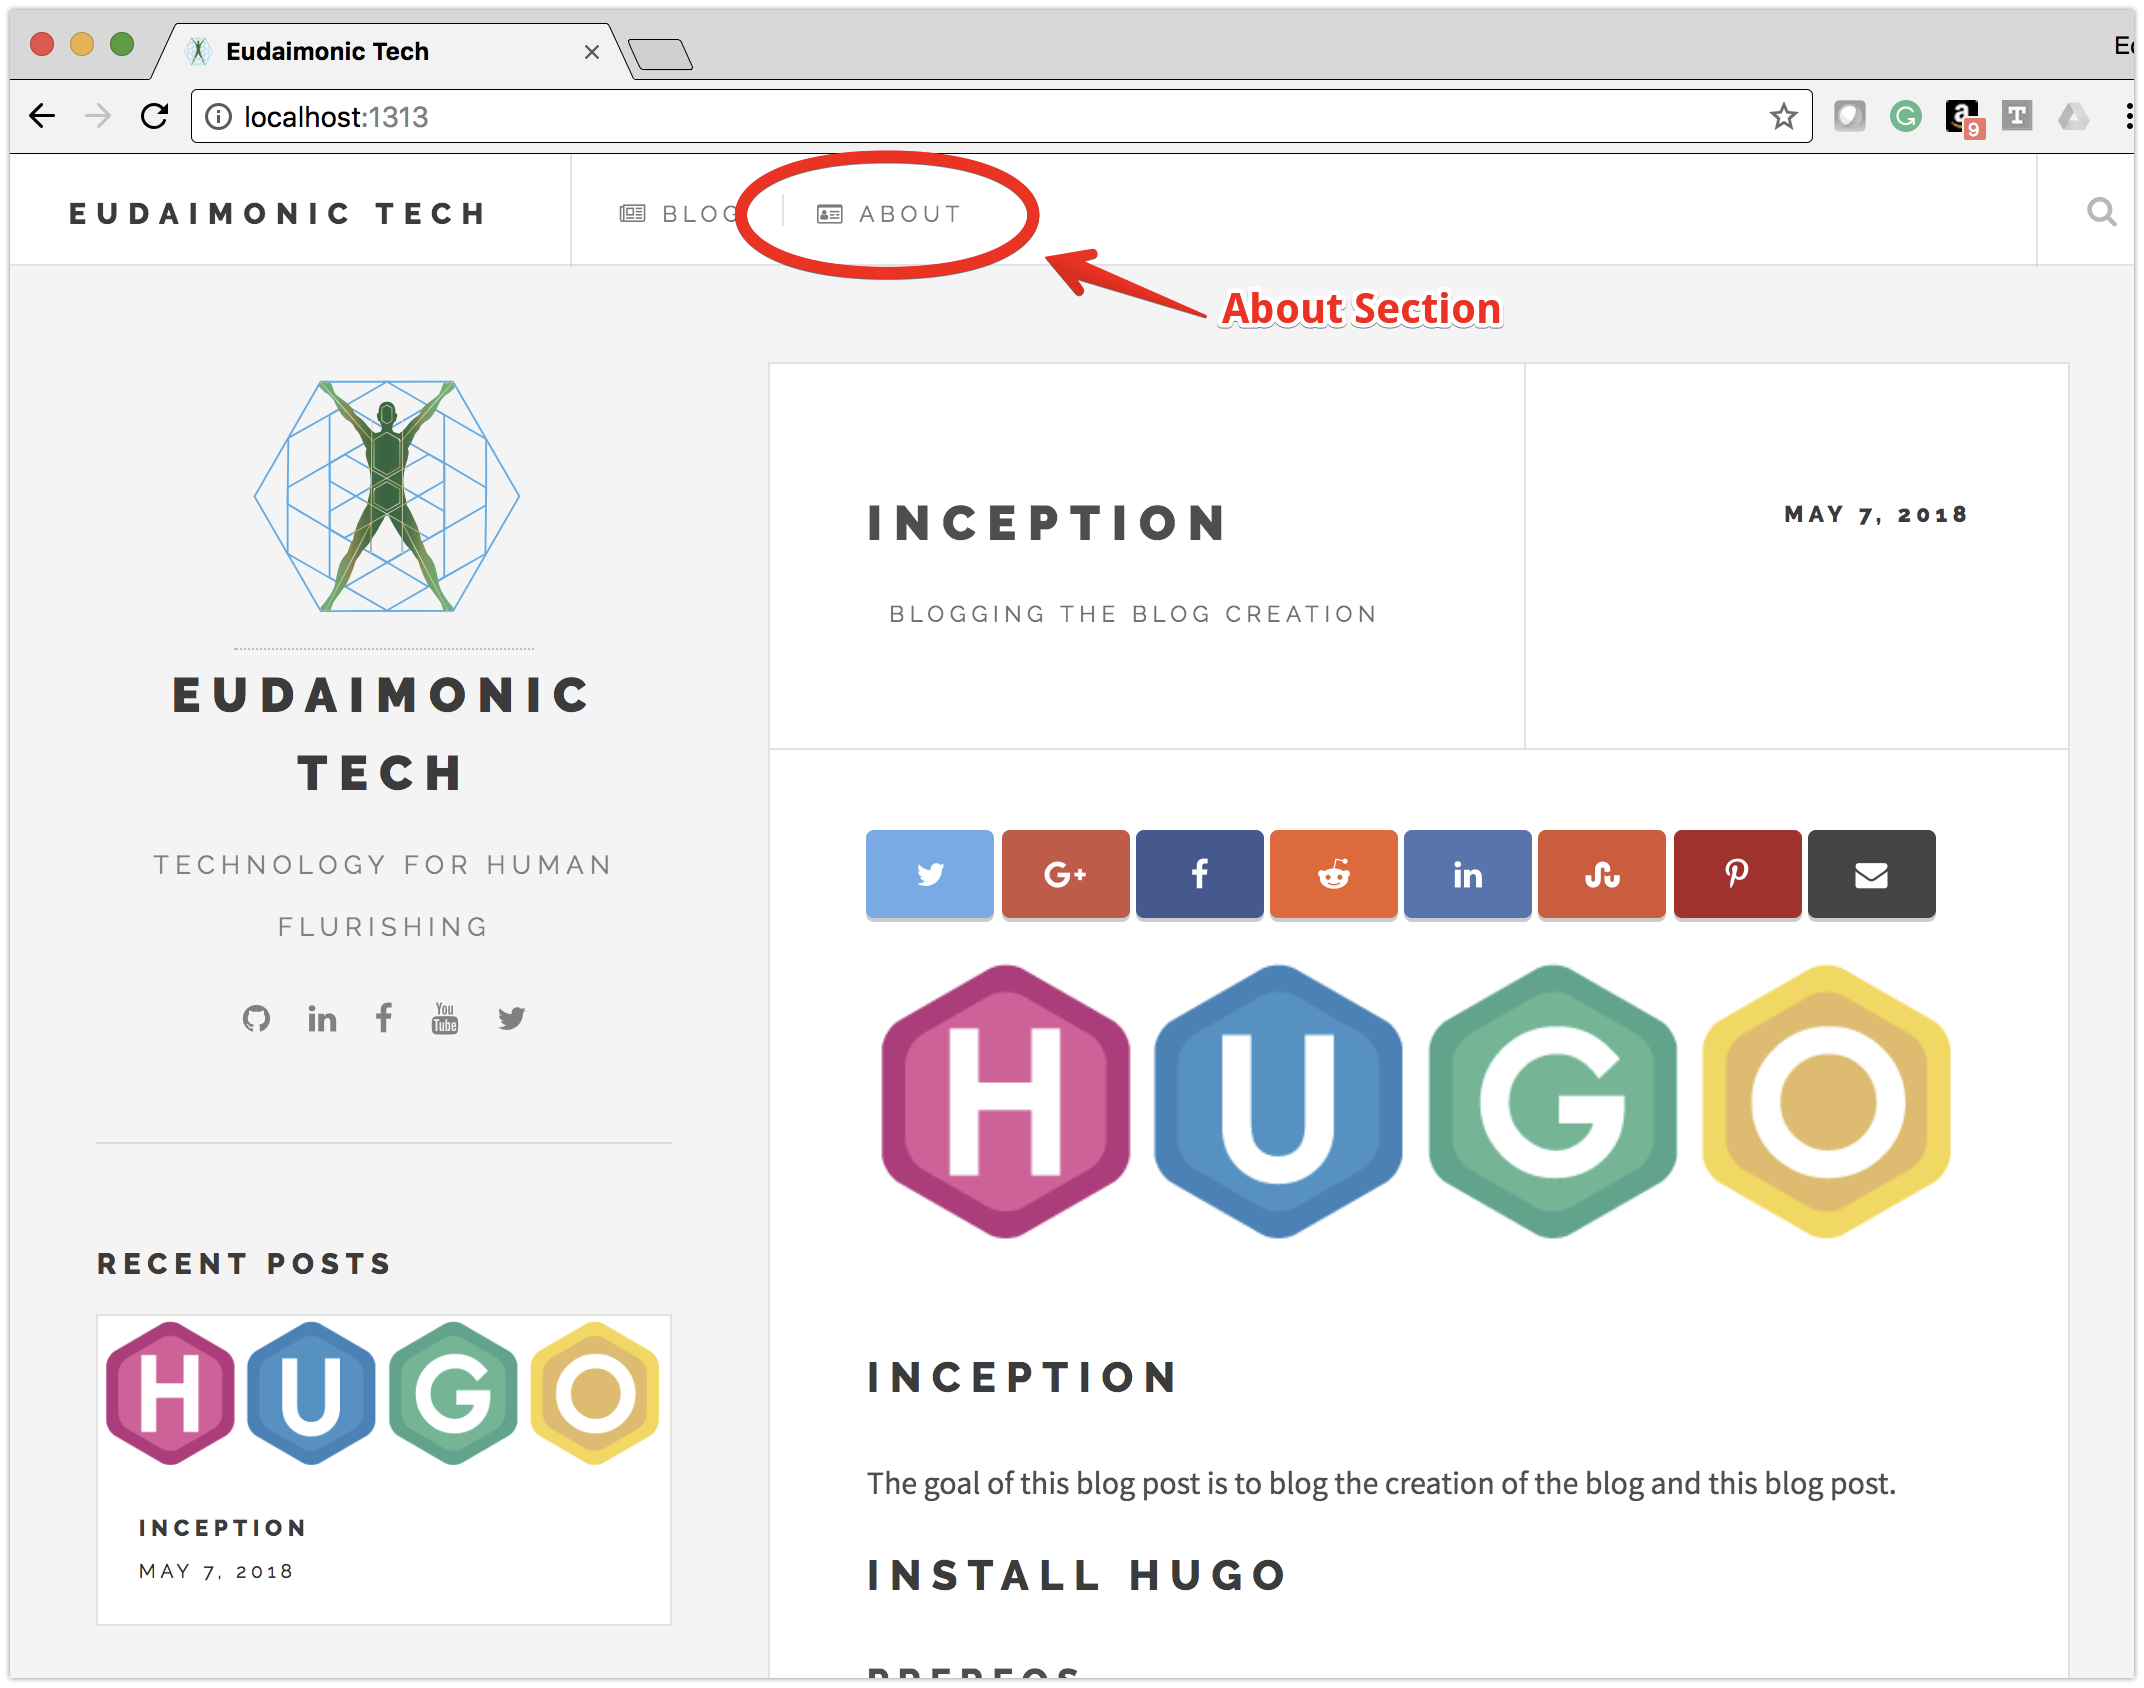
Add an ‘About’ page
hugo new about/_index.html
Add your about content to:
content/about/_index.html
Add the About menu item to your config.toml:
cat << EOF >> config.toml
[[menu.main]]
  name = "About"
  url = "/about/"
  identifier = "fa fa-id-card-o"
  weight = 2
EOF
Commit your changes
git add .
git commit -s -m "Add Inception Blog Post"
Share this post
Twitter
Google+
Facebook
Reddit
LinkedIn
StumbleUpon
Pinterest
Email